
“Get the perfect sight picture with the right optic mount height for your AR-15.”
Importance of Proper AR-15 Optic Mount Height
When it comes to setting up your AR-15 with an optic, one of the most important factors to consider is the height of your optic mount. The height of your optic mount can greatly affect your shooting experience and overall performance with your rifle. Understanding the importance of proper AR-15 optic mount height is crucial for achieving optimal accuracy and comfort while shooting.
Optic mount height refers to the distance between the centerline of your optic and the top of your rifle’s rail. This distance is crucial because it determines the alignment of your eye with the optic, which directly affects your sight picture and accuracy. If your optic mount is too low, you may find yourself straining to get a proper sight picture, leading to discomfort and decreased accuracy. On the other hand, if your optic mount is too high, you may experience issues with eye relief and proper alignment, resulting in a less than ideal shooting experience.
To determine the proper optic mount height for your AR-15, you need to consider a few key factors. The first factor to consider is the type of optic you are using. Different optics have different mounting requirements, so it’s important to choose an optic mount that is compatible with your specific optic. Additionally, you should consider your shooting style and preferences. If you prefer a more upright shooting position, you may want a higher optic mount, whereas if you prefer a more aggressive shooting stance, a lower optic mount may be more suitable.
Another important factor to consider when choosing the right optic mount height is the type of shooting you will be doing. If you are primarily shooting at close ranges, a lower optic mount may be more appropriate, as it will allow for quicker target acquisition. However, if you are shooting at longer ranges, a higher optic mount may be necessary to ensure proper eye relief and alignment.
Proper optic mount height is also crucial for maintaining a consistent cheek weld while shooting. A proper cheek weld is essential for stability and accuracy, so it’s important to choose an optic mount height that allows you to maintain a comfortable and consistent cheek weld every time you shoulder your rifle.
In conclusion, understanding the importance of proper AR-15 optic mount height is essential for achieving optimal accuracy and comfort while shooting. By considering factors such as the type of optic you are using, your shooting style, and the type of shooting you will be doing, you can choose the right optic mount height for your specific needs. Remember, a proper optic mount height can make all the difference in your shooting experience, so take the time to find the perfect height for your AR-15 optic mount.
Different Types of AR-15 Optic Mount Heights
When it comes to setting up your AR-15 with an optic, one of the most important factors to consider is the height of the optic mount. The height of the mount will determine the height at which the optic sits above the rifle’s bore, which can have a significant impact on your shooting experience. In this article, we will explore the different types of AR-15 optic mount heights and how they can affect your shooting performance.
One of the most common optic mount heights for AR-15 rifles is the low mount. Low mounts are typically around 0.83 inches in height and are designed to sit close to the rifle’s bore. This low profile allows for a more natural cheek weld and sight picture, making it easier to acquire targets quickly. Low mounts are ideal for shooters who prefer a more streamlined and compact setup, as they keep the optic close to the rifle’s centerline.
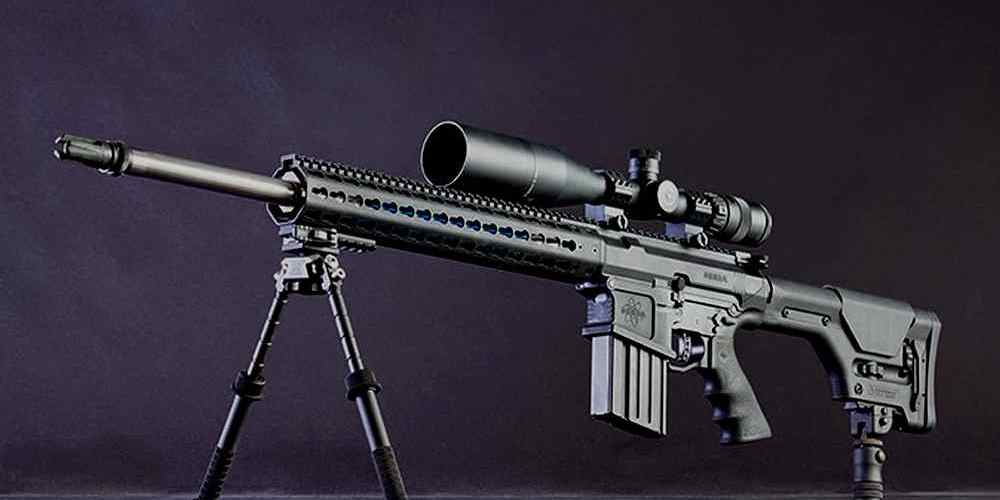
On the other end of the spectrum are high mounts, which sit around 1.5 inches above the bore. High mounts are often used with larger optics or magnifiers, as they provide more clearance for the objective lens and allow for a more comfortable shooting position. While high mounts can offer better visibility over the rifle’s iron sights, they can also create a higher bore axis, which may affect the rifle’s handling and recoil control.
In between low and high mounts are the medium mounts, which typically sit around 1 inch above the bore. Medium mounts strike a balance between the low profile of low mounts and the clearance of high mounts, making them a versatile option for a wide range of shooting applications. Medium mounts are a popular choice for shooters who want a comfortable shooting position without sacrificing too much clearance for larger optics.
When choosing an optic mount height for your AR-15, it’s important to consider your shooting style and preferences. If you prefer a more compact and streamlined setup, a low mount may be the best option for you. On the other hand, if you plan on using larger optics or magnifiers, a high mount may be more suitable. Medium mounts offer a good compromise between the two extremes, providing a comfortable shooting position without sacrificing too much clearance.
It’s also worth noting that the height of the optic mount can affect the rifle’s zero and point of impact. Optics mounted higher above the bore will require more adjustment to zero properly, as the bullet trajectory will be slightly different at longer distances. It’s important to take this into account when setting up your optic mount, as it can affect your shooting accuracy.
In conclusion, understanding AR-15 optic mount heights is essential for optimizing your shooting performance. Whether you prefer a low, medium, or high mount, each option has its own advantages and considerations. By choosing the right optic mount height for your shooting style and preferences, you can ensure a comfortable and accurate shooting experience with your AR-15.
How to Choose the Right Optic Mount Height for Your AR-15
When it comes to setting up your AR-15 with an optic, one of the most important factors to consider is the optic mount height. The height of your optic mount can greatly affect your shooting experience, so it’s crucial to choose the right one for your specific needs.
Optic mount heights are typically measured from the top of the rail to the center of the optic. The most common optic mount heights for AR-15s are absolute co-witness, lower 1/3 co-witness, and full co-witness. Each of these mount heights has its own advantages and disadvantages, so it’s important to understand what each one offers before making a decision.
Absolute co-witness mounts position the optic at the same height as the iron sights on your AR-15. This allows you to use both the optic and iron sights simultaneously, which can be useful in certain situations. However, some shooters find that absolute co-witness mounts can be uncomfortable to use, as they require you to crane your neck to see through the optic.
Lower 1/3 co-witness mounts position the optic slightly higher than the iron sights, allowing for a more comfortable shooting experience. With a lower 1/3 co-witness mount, you can still use your iron sights if your optic fails, but you won’t have to strain your neck to see through the optic. This mount height is a popular choice among many AR-15 shooters for its balance of usability and comfort.
Full co-witness mounts position the optic higher than the iron sights, making it easier to see through the optic without straining your neck. However, with a full co-witness mount, you won’t be able to use your iron sights if your optic fails. This can be a drawback for some shooters who prefer to have a backup sighting system in place.
When choosing the right optic mount height for your AR-15, it’s important to consider your shooting style and preferences. If you value versatility and the ability to use both your optic and iron sights, an absolute co-witness mount may be the best option for you. If comfort is a priority and you don’t mind sacrificing the ability to use your iron sights in a pinch, a lower 1/3 co-witness mount may be the way to go. And if you prioritize ease of use and don’t mind relying solely on your optic, a full co-witness mount could be the right choice for you.
Ultimately, the best optic mount height for your AR-15 will depend on your individual needs and preferences. It’s important to consider how you plan to use your rifle and what features are most important to you when making your decision. By understanding the differences between absolute co-witness, lower 1/3 co-witness, and full co-witness mounts, you can choose the optic mount height that will best suit your shooting style and help you get the most out of your AR-15.
Common Mistakes to Avoid When Selecting Optic Mount Heights
When it comes to selecting optic mount heights for your AR-15, there are a few common mistakes that many shooters make. Understanding the importance of optic mount heights and how they can affect your shooting performance is crucial in making the right choice for your setup.
One of the most common mistakes shooters make is selecting the wrong height for their optic mount. Optic mount heights are designed to align the optic with the shooter’s eye, allowing for proper sight picture and target acquisition. Choosing a mount that is too low can result in a cramped shooting position and difficulty in acquiring a proper sight picture. On the other hand, selecting a mount that is too high can cause the shooter to have to lift their head off the stock, resulting in an uncomfortable shooting position and decreased accuracy.
Another mistake shooters often make is not considering the type of optic they will be using when selecting a mount height. Different optics have different mounting requirements, and it is important to choose a mount that is compatible with your specific optic. For example, red dot sights typically require a lower mount height, while magnified scopes may require a higher mount height to allow for proper eye relief.
It is also important to consider the type of shooting you will be doing when selecting optic mount heights. If you will be shooting at close range or in fast-paced shooting scenarios, a lower mount height may be more suitable. However, if you will be shooting at longer ranges or require precise shot placement, a higher mount height may be necessary to allow for proper eye relief and sight alignment.
When selecting optic mount heights, it is important to take into account the shooter’s individual preferences and shooting style. Some shooters may prefer a higher mount height for a more comfortable shooting position, while others may prefer a lower mount height for a more compact and streamlined setup. It is important to experiment with different mount heights to find the one that works best for you.
In conclusion, understanding AR-15 optic mount heights is crucial in selecting the right mount for your setup. By avoiding common mistakes such as selecting the wrong height, not considering the type of optic being used, and not taking into account individual shooting preferences, shooters can ensure they have a setup that allows for optimal performance and accuracy. Experimenting with different mount heights and seeking advice from experienced shooters can help guide you in selecting the perfect optic mount height for your AR-15.
Tips for Properly Installing and Adjusting AR-15 Optic Mount Heights
When it comes to properly installing and adjusting AR-15 optic mount heights, there are a few key things to keep in mind. Understanding the importance of optic mount heights and how they can affect your shooting accuracy is crucial for any AR-15 owner. In this article, we will discuss some tips and tricks for ensuring that your optic mount is properly installed and adjusted for optimal performance.
One of the first things to consider when installing an optic mount on your AR-15 is the height of the mount itself. Optic mounts come in a variety of heights, and choosing the right one for your specific setup is essential. The height of the mount will determine how high or low your optic sits above the rifle’s bore, which can have a significant impact on your shooting accuracy.
When selecting an optic mount height, it is important to consider the type of optic you will be using. Different optics have different mounting requirements, so be sure to choose a mount that is compatible with your specific optic. Additionally, consider the type of shooting you will be doing. If you will be shooting at longer distances, a higher mount may be more appropriate, while a lower mount may be better for close-range shooting.
Once you have selected the appropriate optic mount height, it is time to install and adjust the mount on your AR-15. Start by ensuring that the mount is securely attached to the rifle’s rail system. Use a torque wrench to tighten the mounting screws to the manufacturer’s recommended specifications to prevent any movement or shifting during use.
Next, it is important to properly align the optic with the rifle’s bore. This can be done by adjusting the windage and elevation settings on the optic itself. Use a boresighter or laser bore sight to help you align the optic with the bore before heading to the range for final adjustments.
When making adjustments to the optic mount height, be sure to do so in small increments. Making large adjustments can throw off the alignment of the optic and may require you to start the adjustment process over again. Take your time and make small adjustments until you achieve the desired height and alignment.
Once you have properly installed and adjusted the optic mount height on your AR-15, it is important to test the setup at the range. Start by zeroing in your optic at a known distance, such as 100 yards. Make any necessary adjustments to the windage and elevation settings until you are consistently hitting your target.
In conclusion, understanding AR-15 optic mount heights is essential for achieving optimal shooting accuracy. By selecting the appropriate mount height, properly installing and adjusting the mount, and testing the setup at the range, you can ensure that your AR-15 is ready for any shooting situation. Remember to take your time, make small adjustments, and practice good shooting fundamentals to get the most out of your AR-15 optic setup.
