
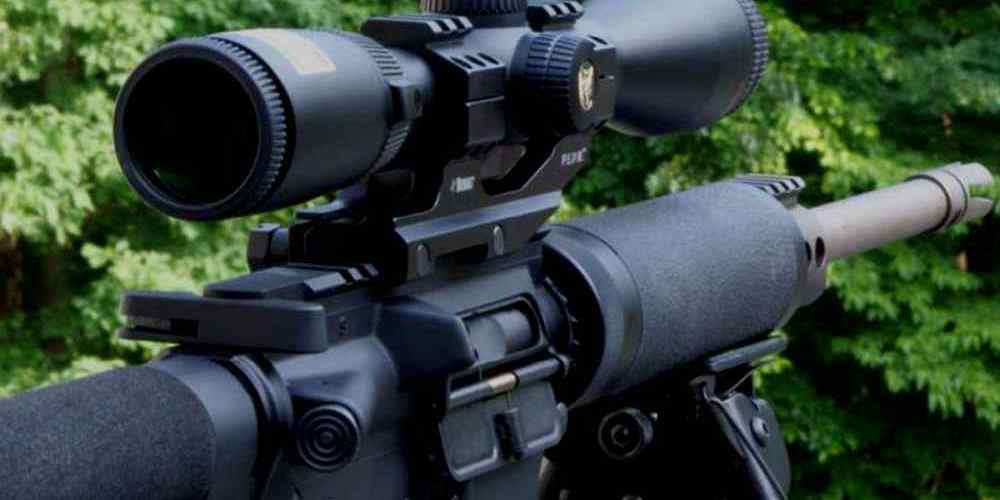
“Transform your AR-15 with a custom paint job or durable Cerakote finish.”
Choosing the Right Paint or Cerakote for Your AR-15
So, you’ve decided that you want to give your AR-15 a fresh new look by painting or Cerakoting it. Congratulations! This can be a fun and rewarding project that allows you to customize your firearm to your liking. However, before you dive into the world of painting or Cerakoting, it’s important to choose the right paint or Cerakote for your AR-15.
When it comes to painting your AR-15, there are a few options to consider. One of the most popular choices is using a high-quality spray paint designed specifically for firearms. These paints are durable, easy to apply, and come in a wide range of colors to suit your preferences. Another option is using a traditional brush-on paint, which can also provide a durable finish if applied correctly.
If you’re looking for a more professional and long-lasting finish, Cerakote is the way to go. Cerakote is a ceramic-based coating that provides excellent protection against wear, corrosion, and chemicals. It’s also available in a wide range of colors and finishes, allowing you to create a truly unique look for your AR-15.
When choosing the right paint or Cerakote for your AR-15, it’s important to consider the intended use of the firearm. If you plan on using your AR-15 for hunting or other outdoor activities, a durable and weather-resistant finish is essential. On the other hand, if you’re simply looking to customize the appearance of your AR-15, you may have more flexibility in choosing a finish that suits your personal style.
Before you start painting or Cerakoting your AR-15, it’s important to properly prepare the surface of the firearm. This includes thoroughly cleaning and degreasing the gun to ensure that the paint or Cerakote adheres properly. You may also need to sand or rough up the surface of the gun to promote adhesion.
Once you’ve chosen the right paint or Cerakote and prepared the surface of your AR-15, it’s time to start applying the finish. If you’re using spray paint, be sure to apply thin, even coats to prevent drips and runs. Allow each coat to dry completely before applying the next one. If you’re using a brush-on paint, take your time and apply the paint in thin layers to achieve a smooth finish.
If you’ve opted for Cerakote, you’ll need to follow the manufacturer’s instructions for mixing and applying the coating. Cerakote requires baking in an oven to cure properly, so be sure to have access to a suitable oven before you start the application process.
In conclusion, choosing the right paint or Cerakote for your AR-15 is an important step in customizing your firearm. Whether you opt for a durable spray paint or a professional-grade Cerakote finish, taking the time to properly prepare the surface of your AR-15 and apply the finish correctly will ensure a long-lasting and attractive result. So, grab your paint or Cerakote and get ready to give your AR-15 a fresh new look!
Preparing Your AR-15 for Painting or Cerakoting
So, you’ve decided that you want to give your AR-15 a fresh new look by painting or cerakoting it. This can be a fun and rewarding project, but it’s important to take the time to properly prepare your firearm before diving into the painting process. In this article, we’ll walk you through the steps you need to take to ensure that your AR-15 is ready for painting or cerakoting.
The first step in preparing your AR-15 for painting or cerakoting is to disassemble the firearm. This will allow you to access all of the parts that need to be painted or cerakoted and will make the process much easier. Make sure to keep track of all of the small parts and screws as you disassemble the gun so that you can easily put it back together later.
Once you have disassembled your AR-15, the next step is to clean it thoroughly. Use a degreaser to remove any oil, grease, or dirt from the surface of the firearm. This will ensure that the paint or cerakote adheres properly to the metal and will result in a more durable finish. Be sure to pay special attention to any areas that are prone to buildup, such as the bolt carrier group and the barrel.
After cleaning your AR-15, you’ll need to rough up the surface of the metal to promote adhesion. You can do this by sanding the metal with a fine-grit sandpaper or by using a sandblaster. This step is crucial for ensuring that the paint or cerakote sticks to the metal and doesn’t chip or peel off over time.
Once you have roughed up the surface of your AR-15, it’s time to apply a primer. The primer will help the paint or cerakote adhere to the metal and will provide a smooth base for the finish coat. Make sure to choose a primer that is compatible with the type of paint or cerakote you plan to use and apply it according to the manufacturer’s instructions.
After applying the primer, you can finally start painting or cerakoting your AR-15. Make sure to apply thin, even coats of paint or cerakote and allow each coat to dry completely before applying the next one. This will help prevent drips and runs in the finish and will result in a more professional-looking end result.
Once you have finished painting or cerakoting your AR-15, allow the finish to cure for the recommended amount of time before reassembling the firearm. This will ensure that the finish is fully cured and will help prevent any damage to the paint or cerakote during reassembly.
In conclusion, preparing your AR-15 for painting or cerakoting is a crucial step in the process that should not be overlooked. By following these steps and taking the time to properly clean, rough up, prime, and paint or cerakote your firearm, you can achieve a professional-looking finish that will last for years to come. So, grab your AR-15 and get ready to give it a fresh new look!
Step-by-Step Guide to Painting Your AR-15
If you’re looking to give your AR-15 a fresh new look, painting or Cerakoting it is a great way to do so. Not only does it allow you to customize the appearance of your rifle, but it also provides added protection against wear and tear. In this step-by-step guide, we’ll walk you through the process of painting or Cerakoting your AR-15.
The first step in painting or Cerakoting your AR-15 is to disassemble the rifle. This involves removing the upper and lower receivers, as well as any other components that you don’t want to paint. Make sure to keep track of all the parts and screws so that you can easily reassemble the rifle later on.
Next, you’ll want to clean the rifle thoroughly to remove any dirt, oil, or grease that may interfere with the painting or Cerakoting process. Use a degreaser and a brush to scrub the surfaces of the rifle, making sure to get into all the nooks and crannies. Once the rifle is clean, rinse it off with water and let it dry completely.
After the rifle is clean and dry, it’s time to apply a base coat. This can be a primer if you’re painting the rifle, or a base coat if you’re Cerakoting it. Make sure to follow the manufacturer’s instructions for applying the base coat, and allow it to dry completely before moving on to the next step.
Once the base coat is dry, you can start applying the paint or Cerakote. If you’re painting the rifle, you can use a variety of different paints, such as spray paint or Duracoat. Make sure to apply thin, even coats, and allow each coat to dry before applying the next one. If you’re Cerakoting the rifle, you’ll need to mix the Cerakote with a hardener and apply it using an airbrush or spray gun. Again, make sure to apply thin, even coats and allow each coat to dry before applying the next one.
After you’ve applied the paint or Cerakote, you’ll need to cure it. If you’re painting the rifle, you can do this by baking it in an oven at a low temperature for a few hours. If you’re Cerakoting the rifle, you’ll need to let it air dry for a few hours before baking it in an oven at a higher temperature for a few hours. Make sure to follow the manufacturer’s instructions for curing the paint or Cerakote.
Once the paint or Cerakote is cured, you can reassemble the rifle. Make sure to refer to your notes or take pictures during the disassembly process so that you can easily put the rifle back together. Once the rifle is reassembled, you’re ready to hit the range and show off your newly painted or Cerakoted AR-15.
In conclusion, painting or Cerakoting your AR-15 is a fun and rewarding way to customize your rifle. By following this step-by-step guide, you can achieve professional-looking results that will protect your rifle and make it stand out on the range. So grab your paint or Cerakote and get started on giving your AR-15 a fresh new look today!
Step-by-Step Guide to Cerakoting Your AR-15
So you’ve decided to give your AR-15 a fresh new look by painting or cerakoting it. This can be a fun and rewarding project that allows you to customize your firearm to your liking. Whether you’re looking to add some flair with a unique color scheme or simply want to protect your gun from the elements, painting or cerakoting your AR-15 is a great way to achieve both.
Before you get started, it’s important to gather all the necessary supplies. You’ll need a well-ventilated workspace, painter’s tape, degreaser, sandpaper, a spray gun or airbrush, and of course, your chosen paint or cerakote. Make sure to thoroughly clean your AR-15 with the degreaser to remove any oils or residue that could interfere with the adhesion of the paint or cerakote.
Once your gun is clean and dry, it’s time to start prepping the surface. Use the sandpaper to rough up the existing finish on your AR-15. This will help the paint or cerakote adhere better and ensure a long-lasting finish. Be sure to tape off any areas you don’t want to paint, such as the barrel or trigger mechanism.
Now comes the fun part – applying the paint or cerakote. If you’re using paint, make sure to apply thin, even coats to avoid drips or runs. Allow each coat to dry completely before applying the next one. If you’re using cerakote, follow the manufacturer’s instructions for mixing and applying the product. Cerakote is a more durable finish than paint and will provide better protection for your AR-15.
Once you’ve applied the final coat of paint or cerakote, allow it to cure for the recommended amount of time. This will ensure that the finish is fully hardened and ready for use. Once the finish is cured, remove the painter’s tape and admire your handiwork.
Painting or cerakoting your AR-15 is a great way to personalize your firearm and protect it from the elements. With the right supplies and a little bit of patience, you can achieve a professional-looking finish that will last for years to come. So why not give it a try and see what you can create?
Tips and Tricks for a Professional Finish on Your Painted or Cerakoted AR-15
If you’re looking to give your AR-15 a fresh new look, painting or Cerakoting it is a great way to achieve a professional finish. Whether you’re a seasoned gun enthusiast or a beginner looking to customize your firearm, there are a few tips and tricks to keep in mind to ensure a successful paint job.
First and foremost, preparation is key when it comes to painting or Cerakoting your AR-15. Make sure to thoroughly clean and degrease the surface of the gun before applying any paint or coating. This will help the paint adhere better and prevent any imperfections in the finish.
When choosing a paint or Cerakote color, consider the environment in which you’ll be using your AR-15. If you’ll be using it in a wooded area, earth tones may be a good choice. If you’ll be using it in an urban setting, darker colors may be more appropriate. Whatever color you choose, make sure it complements the overall look of your firearm.
When applying the paint or Cerakote, be sure to do so in a well-ventilated area to avoid inhaling any fumes. It’s also important to apply thin, even coats to prevent drips or runs in the finish. Allow each coat to dry completely before applying the next one to ensure a smooth and professional-looking finish.
If you’re painting your AR-15, consider using a stencil or masking tape to create a custom design or pattern. This can add a unique touch to your firearm and make it stand out from the rest. Just be sure to remove the stencil or tape carefully to avoid damaging the finish.
For those choosing to Cerakote their AR-15, be sure to follow the manufacturer’s instructions carefully. Cerakote is a durable and long-lasting coating, but it requires proper application to achieve the best results. Be patient and take your time to ensure a flawless finish.
After painting or Cerakoting your AR-15, be sure to allow the finish to cure completely before handling or using the firearm. This will help prevent any smudges or imperfections in the finish. Once the finish has cured, you can reassemble your AR-15 and enjoy your newly customized firearm.
In conclusion, painting or Cerakoting your AR-15 is a great way to give it a fresh new look and make it stand out from the crowd. By following these tips and tricks, you can achieve a professional finish that will last for years to come. So grab your paint or Cerakote and get started on customizing your AR-15 today!
