“Empower yourself with DIY AR15 Lowers: Tools and Skills You Need”

Essential Tools for DIY AR15 Lowers
Building your own AR15 lower receiver can be a rewarding and cost-effective way to customize your firearm. However, before you dive into this project, it’s important to make sure you have the right tools and skills to get the job done correctly. In this article, we’ll discuss the essential tools you’ll need to successfully complete a DIY AR15 lower build.

One of the most important tools you’ll need for this project is a good quality vise. A vise will hold your lower receiver securely in place while you work on it, ensuring that you can make precise cuts and drill holes without the receiver moving around. Look for a vise that is sturdy and has a wide opening to accommodate the size of your lower receiver.
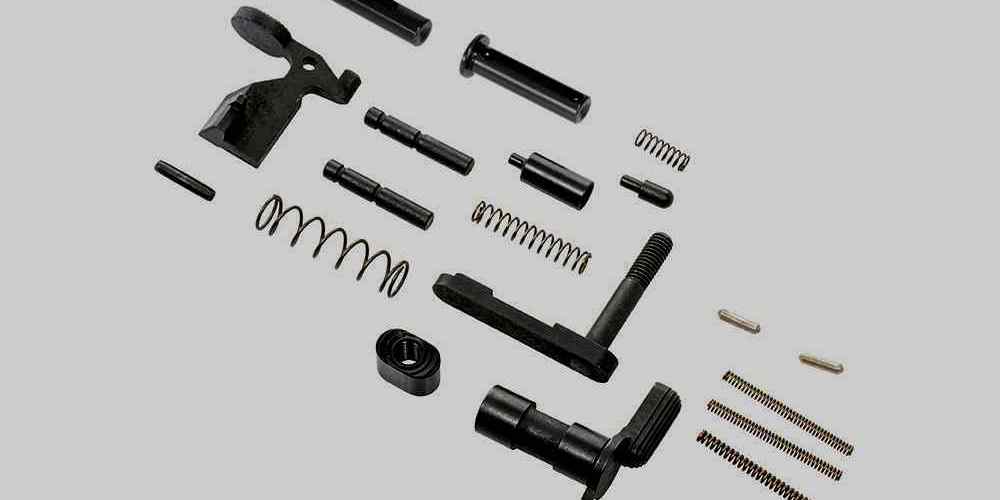
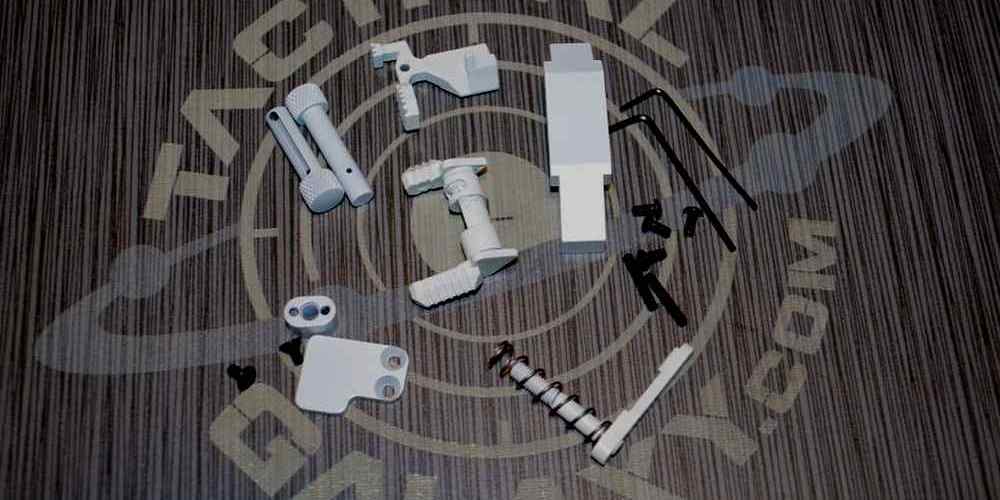
In addition to a vise, you’ll also need a set of punches and a hammer. These tools will be used to drive out pins and other components from the lower receiver. Make sure you have punches of various sizes to accommodate different pin sizes, and use a hammer with a non-marring head to avoid damaging the receiver.
A set of roll pin punches is also essential for installing roll pins in your lower receiver. Roll pins are used to secure various components in place, such as the trigger guard and bolt catch. Using roll pin punches will make it easier to drive the pins into place without damaging the receiver or the pins themselves.

Another important tool for a DIY AR15 lower build is a set of Allen wrenches. Allen wrenches are used to tighten screws and bolts on the lower receiver, such as the pistol grip and buffer tube. Make sure you have a set of Allen wrenches in various sizes to accommodate different screw and bolt sizes on your receiver.
A torque wrench is also a must-have tool for this project. A torque wrench will ensure that you tighten screws and bolts to the correct specifications, preventing over-tightening or under-tightening that could lead to malfunctions or damage to your firearm. Make sure you have a torque wrench that is calibrated in inch-pounds for use on your AR15 lower receiver.
Finally, you’ll need a set of needle files for finishing touches on your lower receiver. Needle files are used to smooth out rough edges and remove burrs from drilled holes, ensuring that your receiver looks clean and professional. Look for needle files with fine grit for the best results.
In addition to the tools mentioned above, you’ll also need a few essential skills to successfully complete a DIY AR15 lower build. Patience and attention to detail are key, as this project requires precision and care to ensure that all components are installed correctly. Take your time and double-check your work at each step to avoid costly mistakes.
Having a basic understanding of firearm mechanics and terminology will also be helpful for this project. Familiarize yourself with the different components of an AR15 lower receiver and how they work together to ensure that you can assemble your receiver correctly.
By having the right tools and skills, you can successfully complete a DIY AR15 lower build and customize your firearm to your liking. Take your time, follow instructions carefully, and enjoy the process of building your own AR15 lower receiver.
Advanced Skills Required for DIY AR15 Lowers
Building your own AR15 lower receiver can be a rewarding and cost-effective way to customize your firearm. However, it’s important to have the right tools and skills before you embark on this project. In this article, we’ll discuss the tools and skills you need to successfully complete a DIY AR15 lower.
One of the most important tools you’ll need for this project is a good quality drill press. A drill press will allow you to accurately drill the holes needed for the trigger pins, hammer pins, and safety selector. It’s important to use a drill press with a depth stop to ensure that you don’t drill too deep and damage the lower receiver.
You’ll also need a set of drill bits specifically designed for drilling metal. These bits are made of high-speed steel and are designed to withstand the high speeds and pressures of drilling through aluminum. It’s important to use the correct size drill bit for each hole to ensure a proper fit for the pins and other components.
In addition to a drill press and drill bits, you’ll also need a set of punches and a hammer. These tools will be used to drive in the roll pins that secure the trigger guard, bolt catch, and other components to the lower receiver. It’s important to use the correct size punch for each roll pin to avoid damaging the lower receiver.
Another essential tool for this project is a vise. A vise will hold the lower receiver securely in place while you drill, tap, and assemble the components. It’s important to use a vise with soft jaws to prevent marring the finish of the lower receiver.
In addition to the tools mentioned above, you’ll also need a set of Allen wrenches, a torque wrench, and a set of screwdrivers. These tools will be used to tighten the screws, nuts, and bolts that hold the components together. It’s important to use the correct size and type of tool for each fastener to avoid stripping or damaging the threads.
Now that we’ve discussed the tools you’ll need for this project, let’s talk about the skills required to successfully complete a DIY AR15 lower. One of the most important skills you’ll need is patience. Building an AR15 lower receiver requires precision and attention to detail, so it’s important to take your time and double-check your work at each step.
You’ll also need basic mechanical skills, such as the ability to read and follow instructions, use hand tools, and understand how the components fit together. If you’re not comfortable with these skills, it may be best to seek help from a professional gunsmith or experienced builder.
In conclusion, building your own AR15 lower receiver can be a challenging but rewarding project. With the right tools and skills, you can customize your firearm to your liking and gain a deeper understanding of how it functions. Just remember to take your time, follow the instructions carefully, and seek help if needed. Happy building!
Tips for Precision Machining in DIY AR15 Lowers
Building your own AR15 lower receiver can be a rewarding and cost-effective way to customize your firearm to your exact specifications. However, precision machining is key to ensuring that your DIY lower functions properly and safely. In this article, we will discuss the tools and skills you need to successfully machine your own AR15 lower receiver.
One of the most important tools you will need for machining your AR15 lower is a quality drill press. A drill press will allow you to accurately drill the necessary holes in your lower receiver to ensure proper alignment and fit. Additionally, a vise is essential for securely holding your lower receiver in place while you work on it. This will help prevent any movement or slippage that could result in inaccuracies in your machining.
In addition to a drill press and vise, you will also need a set of high-quality drill bits. It is important to use the correct size drill bits for each hole in your lower receiver to ensure a proper fit for all components. Investing in a set of carbide drill bits will help ensure clean and precise cuts in your lower receiver.
Another essential tool for machining your AR15 lower is a quality end mill. An end mill is used to cut the fire control cavity in your lower receiver, which houses the trigger, hammer, and other components. Using a high-quality end mill will help you achieve clean and precise cuts, ensuring that your lower functions properly.
In addition to the right tools, you will also need to have the necessary skills to successfully machine your AR15 lower receiver. Precision machining requires attention to detail and patience. Take your time and double-check your measurements to ensure accuracy in your cuts. Practice good safety habits, such as wearing eye protection and using proper ventilation when working with metal.
If you are new to machining, consider taking a class or seeking guidance from an experienced machinist. Learning proper techniques and best practices will help you avoid costly mistakes and ensure that your DIY lower functions properly.
When machining your AR15 lower, it is important to follow the manufacturer’s instructions carefully. Each lower receiver may have slightly different specifications, so be sure to reference the appropriate documentation for your specific lower. Additionally, be sure to test fit all components before final assembly to ensure proper alignment and function.
In conclusion, machining your own AR15 lower receiver can be a rewarding and cost-effective way to customize your firearm. By investing in the right tools and developing the necessary skills, you can achieve a high level of precision in your machining. Take your time, follow best practices, and seek guidance when needed to ensure a successful build. With the right tools and skills, you can create a custom AR15 lower that meets your exact specifications and functions reliably for years to come.
Common Mistakes to Avoid in DIY AR15 Lowers
When it comes to building your own AR15 lower receiver, there are a few common mistakes that many DIY enthusiasts make. These mistakes can lead to issues with the functionality and safety of your firearm, so it’s important to be aware of them and take steps to avoid them. In this article, we’ll discuss some of the most common mistakes that people make when building their own AR15 lowers, and provide tips on how to avoid them.
One of the most common mistakes that people make when building their own AR15 lower receiver is not using the right tools. Building an AR15 lower requires a specific set of tools, including a vise, torque wrench, and armorer’s wrench. Using the wrong tools can lead to improperly installed parts, which can affect the functionality of your firearm. Make sure you have all the necessary tools before you start your build, and take the time to familiarize yourself with how to use them properly.
Another common mistake that people make when building their own AR15 lower is not having the necessary skills or knowledge. Building an AR15 lower requires a certain level of technical expertise, and if you don’t have the necessary skills, you may end up making mistakes that can affect the safety and performance of your firearm. Before you start your build, take the time to educate yourself on the process and make sure you have the necessary skills to complete the build successfully.
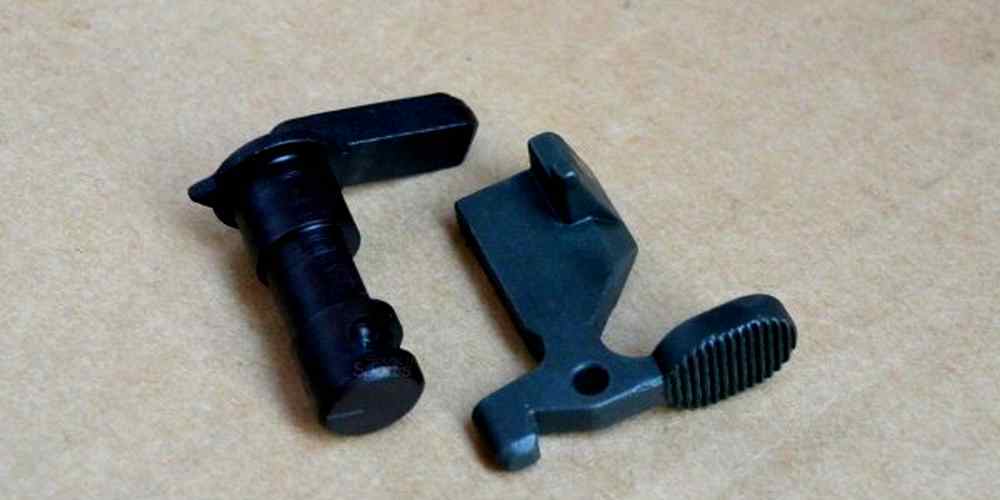
One of the most important steps in building an AR15 lower is properly installing the trigger group. This is a critical component of your firearm, and if it is not installed correctly, it can lead to issues with the functionality and safety of your firearm. Make sure you follow the manufacturer’s instructions carefully when installing the trigger group, and double-check your work to ensure that everything is installed correctly.
Another common mistake that people make when building their own AR15 lower is not properly torquing the buffer tube. The buffer tube is a critical component of your firearm, and if it is not torqued to the proper specifications, it can lead to issues with the functionality of your firearm. Make sure you use a torque wrench to properly torque the buffer tube to the manufacturer’s specifications, and double-check your work to ensure that it is installed correctly.
Finally, one of the most common mistakes that people make when building their own AR15 lower is not properly testing the firearm before use. Once you have completed your build, it is important to thoroughly test the functionality of your firearm to ensure that everything is working correctly. Make sure you test the safety, trigger, and overall functionality of your firearm before taking it to the range.
In conclusion, building your own AR15 lower can be a rewarding and satisfying experience, but it is important to be aware of the common mistakes that people make when building their own lowers. By using the right tools, having the necessary skills and knowledge, properly installing critical components, and thoroughly testing your firearm before use, you can avoid these common mistakes and ensure that your DIY AR15 lower is safe and functional.
Safety Precautions for DIY AR15 Lowers
When it comes to building your own AR15 lower receiver, safety should always be your top priority. While it can be a rewarding and cost-effective project, it’s important to take the necessary precautions to ensure that you and those around you stay safe throughout the process.
One of the first safety precautions you should take is to familiarize yourself with the proper tools and equipment needed for the job. This includes a vise, hammer, punches, and a torque wrench, among other tools. It’s important to use the right tools for the job to prevent accidents and ensure that your lower receiver is assembled correctly.
Additionally, it’s crucial to have a clean and organized workspace. Make sure that you have plenty of room to work and that your work area is free of clutter. This will help prevent accidents and make it easier to keep track of all the small parts and pieces that are involved in building an AR15 lower receiver.
Another important safety precaution to take is to wear the appropriate safety gear. This includes safety glasses to protect your eyes from flying debris, as well as ear protection to guard against loud noises. Additionally, wearing gloves can help protect your hands from sharp edges and prevent injuries while handling small parts.
Before you begin assembling your AR15 lower receiver, it’s also a good idea to familiarize yourself with the proper assembly process. This includes reading the manufacturer’s instructions carefully and watching tutorial videos to ensure that you understand each step of the process. Taking the time to educate yourself on the assembly process will help prevent mistakes and ensure that your lower receiver functions properly.
As you work on assembling your AR15 lower receiver, it’s important to take your time and work carefully. Rushing through the process can lead to mistakes and potentially dangerous errors. Make sure to double-check each step as you go and don’t be afraid to ask for help if you’re unsure about something.
Once you’ve completed the assembly process, it’s important to perform a function check to ensure that your lower receiver is working properly. This includes checking the safety selector, trigger, and magazine release to make sure that they function correctly. If you encounter any issues during the function check, it’s important to address them before using your AR15 lower receiver.
Finally, it’s important to store your AR15 lower receiver safely when it’s not in use. This includes keeping it in a secure location away from children and unauthorized users. Additionally, make sure to follow all local laws and regulations regarding the storage and transportation of firearms.
By taking these safety precautions when building your own AR15 lower receiver, you can ensure that the process is both enjoyable and safe. Remember to use the proper tools, wear the appropriate safety gear, and take your time to assemble your lower receiver correctly. With the right precautions in place, you can enjoy the satisfaction of building your own AR15 lower receiver while staying safe throughout the process.