“Building with confidence, assembling with safety.”
Proper Handling of Firearms
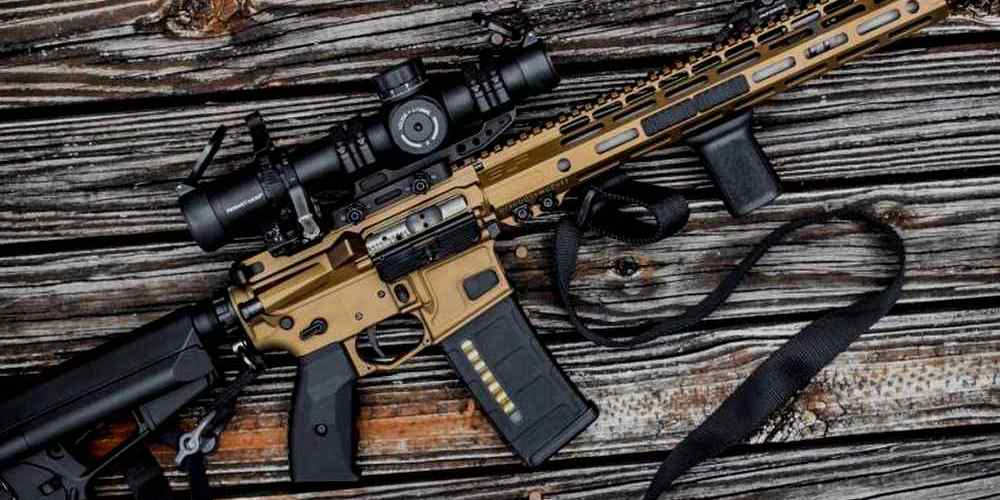
Building your own AR15 can be a rewarding and fulfilling experience. However, it is crucial to prioritize safety throughout the assembly process. Proper handling of firearms is essential to prevent accidents and ensure a smooth build. In this article, we will discuss the AR15 builder’s safety checklist to help you stay safe while putting together your rifle. First and foremost, always treat your firearm as if it is loaded. Even if you are certain that the gun is empty, always double-check by visually inspecting the chamber and magazine well. Never point the gun at anything you are not willing to destroy, and keep your finger off the trigger until you are ready to shoot. These basic safety rules are the foundation of responsible gun ownership and should be followed at all times. When assembling your ar15, make sure to work in a clean and well-lit area. This will help you see any small parts or potential issues more clearly. Keep your work area organized and free of clutter to prevent accidents or misplaced components. Additionally, always wear safety glasses to protect your eyes from any flying debris or small parts that may come loose during assembly. Before starting the build, familiarize yourself with the different parts of the AR15 and how they fit together. Refer to the manufacturer’s instructions or online resources to ensure you are assembling the rifle correctly. Take your time and double-check each step to avoid any mistakes that could compromise the safety or functionality of the firearm. As you begin assembling your AR15, make sure to use the correct tools for the job. Using the wrong tools can damage the components or lead to improper assembly, which can be dangerous. Invest in quality tools and follow the manufacturer’s recommendations for torque specifications to ensure a secure and safe build. During the assembly process, pay close attention to the fit and function of each part. If something does not seem right or if a component is not fitting properly, stop and reassess the situation. Do not force any parts together, as this can cause damage or create a safety hazard. Take your time and make sure everything is aligned and functioning correctly before moving on to the next step. Once you have completed the assembly of your AR15, perform a thorough function check to ensure everything is working properly. Check the safety selector, trigger, and magazine release to make sure they are functioning as intended. Test fire the rifle in a safe and controlled environment to ensure it is cycling correctly and shooting accurately. After completing the build, always store your firearm in a secure location away from children or unauthorized users. Use a locking gun cabinet or safe to prevent accidents and theft. Remember to follow all local laws and regulations regarding the storage and transportation of firearms to stay in compliance with the law. By following the AR15 builder’s safety checklist and prioritizing safety throughout the assembly process, you can enjoy the satisfaction of building your own rifle while staying safe and responsible. Remember to always treat your firearm with respect and follow proper safety protocols to prevent accidents and ensure a successful build. Happy building!
Importance of Safety Gear
Building your own AR15 can be a rewarding and fulfilling experience. However, it is crucial to prioritize safety throughout the assembly process. One of the most important aspects of ensuring a safe build is having the right safety gear on hand. In this article, we will discuss the importance of safety gear and provide a checklist of essential items to have before you start building your AR15. Safety gear is essential when working with firearms, as accidents can happen even to the most experienced builders. One of the most important pieces of safety gear to have is a pair of safety glasses. These will protect your eyes from any flying debris or metal shavings that may occur during the assembly process. Additionally, wearing gloves is also recommended to protect your hands from sharp edges and hot surfaces. Another crucial piece of safety gear to have is a set of ear protection. The sound of a firearm being discharged can be extremely loud, and prolonged exposure can cause hearing damage. By wearing ear protection while building your AR15, you can protect your hearing and ensure a safe and comfortable working environment. In addition to safety glasses, gloves, and ear protection, it is also important to have a well-ventilated workspace. Working with chemicals and solvents during the assembly process can release harmful fumes that can be dangerous if inhaled. Make sure to work in a well-ventilated area or use a respirator to protect yourself from any harmful fumes. Having the right safety gear is essential for ensuring a safe and successful build. Now that we have discussed the importance of safety gear, let’s move on to the AR15 builder’s safety checklist. This checklist will help you ensure that you have all the necessary items before you start building your AR15. The first item on the AR15 builder’s safety checklist is a set of quality tools. Having the right tools on hand will make the assembly process much easier and safer. Some essential tools to have include a set of screwdrivers, a torque wrench, and a vise block. These tools will help you properly tighten screws and pins, ensuring that your AR15 is assembled correctly and securely. Next on the checklist is a cleaning kit. Keeping your AR15 clean and well-maintained is essential for its proper function and longevity. A cleaning kit will help you remove any dirt, debris, or fouling that may accumulate in your firearm. Regular cleaning and maintenance will also help prevent malfunctions and ensure that your AR15 operates safely and reliably. Another important item on the checklist is a set of assembly instructions. Building an AR15 can be a complex process, especially for beginners. Having a set of clear and detailed instructions will help guide you through the assembly process and ensure that you are building your AR15 correctly. Make sure to read and follow the instructions carefully to avoid any mistakes or accidents. In conclusion, safety gear is essential when building your own AR15. By having the right safety gear on hand, you can protect yourself from potential hazards and ensure a safe and successful build. Additionally, following the AR15 builder’s safety checklist will help you ensure that you have all the necessary items before you start building your AR15. By prioritizing safety throughout the assembly process, you can enjoy the process of building your own AR15 while staying safe and secure.
Checking Parts for Defects
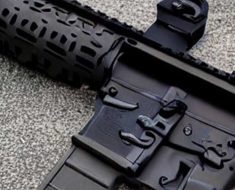
Building your own AR15 can be a rewarding and fulfilling experience, but it’s important to prioritize safety throughout the assembly process. One crucial step in ensuring a safe build is checking all parts for defects before putting them together. By carefully inspecting each component, you can identify any issues that may compromise the functionality or safety of your firearm. Start by laying out all of the parts in a well-lit and organized workspace. Take your time to examine each piece closely, looking for any signs of damage, wear, or irregularities. Check for cracks, dents, scratches, or any other visible defects that could affect the performance of the part. Pay special attention to critical components such as the barrel, bolt carrier group, and trigger assembly. Inspect the barrel for any signs of pitting, corrosion, or damage to the rifling. Make sure the chamber is clean and free of obstructions. Check the muzzle crown for any nicks or burrs that could affect accuracy. If you’re using a used barrel, check the bore for signs of wear or erosion that could compromise the integrity of the barrel. Next, examine the bolt carrier group for any signs of wear or damage. Inspect the bolt face for any cracks or deformities that could cause malfunctions. Check the gas key for proper staking and ensure that the gas rings are in good condition. Make sure the firing pin moves freely and is not bent or damaged. Inspect the trigger assembly for any signs of wear or damage. Check the sear engagement surfaces for smoothness and consistency. Ensure that all springs and pins are properly installed and functioning correctly. Test the trigger pull to ensure it is smooth and consistent. Check the lower receiver for any cracks, dents, or other defects that could affect the structural integrity of the firearm. Inspect the magazine well for proper fit and alignment. Check the buffer tube for any signs of damage or wear. Ensure that the safety selector functions properly and engages/disengages smoothly. Inspect the handguard for any cracks, dents, or other defects that could affect the stability of the firearm. Check the rail system for proper alignment and fit. Ensure that all screws and fasteners are tightened securely. Once you have thoroughly inspected all parts for defects, it’s time to assemble your AR15. Follow the manufacturer’s instructions carefully and double-check each step to ensure proper assembly. Test the functionality of the firearm before firing it to ensure that everything is working correctly. By following this safety checklist and carefully inspecting all parts for defects, you can ensure a safe and reliable build. Remember, safety should always be your top priority when building or handling firearms. Happy building!
Assembly Process Step-by-Step
Building your own AR15 can be a rewarding and fulfilling experience. However, it is crucial to prioritize safety throughout the assembly process to ensure that your firearm functions properly and safely. To help you navigate the assembly process with confidence, we have compiled a safety checklist to guide you through each step. First and foremost, before you begin assembling your AR15, it is essential to familiarize yourself with the firearm’s components and how they fit together. This will not only make the assembly process smoother but also help you identify any potential issues or errors along the way. Take the time to read through the manufacturer’s instructions and any additional resources to ensure that you have a clear understanding of the assembly process. Once you have familiarized yourself with the components, it is time to gather all the necessary tools and equipment. Make sure that you have a clean and well-lit workspace to work in, as this will help you stay organized and focused throughout the assembly process. Additionally, ensure that all tools are in good working condition and that you have the appropriate tools for each step of the assembly process. As you begin assembling your AR15, it is crucial to double-check each component before installation. Inspect each part for any signs of damage or wear, as using damaged components can compromise the safety and functionality of your firearm. Additionally, ensure that all components are compatible with each other and that they fit together properly. Throughout the assembly process, it is important to handle all components with care and attention to detail. Avoid rushing through the assembly process, as this can lead to mistakes and oversights that could compromise the safety of your firearm. Take your time to ensure that each component is installed correctly and securely. As you progress through the assembly process, periodically stop to check your work and ensure that everything is coming together as it should. Double-check each step against the manufacturer’s instructions to ensure that you are following the correct sequence and procedures. If you encounter any difficulties or uncertainties, do not hesitate to seek help from a knowledgeable source or professional gunsmith. Once you have completed the assembly process, it is crucial to perform a thorough safety check before test-firing your AR15. Check all components for proper installation and alignment, and ensure that all fasteners are tightened securely. Additionally, inspect the firearm for any signs of damage or wear that may have occurred during assembly. Before test-firing your AR15, it is essential to familiarize yourself with the firearm’s operation and safety features. Ensure that you understand how to safely load, unload, and operate your firearm, and always follow proper safety protocols when handling and firing your AR15. In conclusion, building your own AR15 can be a rewarding experience, but it is essential to prioritize safety throughout the assembly process. By following this safety checklist and taking the time to familiarize yourself with the components and procedures, you can ensure that your firearm functions properly and safely. Remember to take your time, double-check your work, and seek help if needed to ensure a successful and safe assembly process.
Final Safety Inspection and Testing
Now that you have completed the assembly of your AR15, it is crucial to perform a final safety inspection and testing to ensure that your firearm is safe to use. This step is essential to prevent any potential accidents or malfunctions that could occur during use. By following this safety checklist, you can rest assured that your AR15 is in proper working order and ready for use. First and foremost, visually inspect all components of your AR15 to ensure that they are properly installed and secured. Check that all pins, screws, and other fasteners are tightened to the manufacturer’s specifications. Look for any signs of wear or damage on the parts, such as cracks, dents, or scratches. If you notice any issues, replace the affected parts before proceeding. Next, check the functionality of the safety selector switch. Ensure that it moves smoothly between safe, semi-automatic, and fully automatic modes, if applicable. Test the trigger to make sure it functions properly and does not have any excessive play or resistance. If you encounter any issues with the safety selector switch or trigger, do not attempt to use the firearm until the problem is resolved. After inspecting the individual components, perform a function check on your AR15. With the firearm unloaded, engage the safety selector switch to the safe position and attempt to pull the trigger. The hammer should not release. Next, switch the safety selector to the semi-automatic position and pull the trigger. The hammer should release and reset after each pull. Finally, if your AR15 has a fully automatic mode, switch the selector to this position and test the trigger. The firearm should fire continuously as long as the trigger is held down. Once you have completed the function check, it is time to test fire your AR15. Find a safe and legal location to discharge your firearm, such as a shooting range or private property with a suitable backstop. Load a few rounds of ammunition into the magazine and insert it into the firearm. Follow all safety protocols and guidelines for handling and firing a firearm. When you are ready to test fire, assume a proper shooting stance and aim at your target. Engage the safety selector switch to the appropriate firing mode and pull the trigger. Pay attention to how the firearm functions and how the rounds are ejected. Listen for any unusual sounds or feel for any abnormal recoil. If you experience any issues during test firing, stop immediately and inspect the firearm for any malfunctions. After test firing, inspect the spent casings for any signs of overpressure or other abnormalities. Check the bore for any obstructions or fouling that could affect the performance of the firearm. Clean and lubricate your AR15 according to the manufacturer’s recommendations to ensure proper function and longevity. By following this safety checklist for the final inspection and testing of your AR15, you can ensure that your firearm is safe to use and ready for action. Remember to always handle firearms responsibly and follow all safety guidelines to prevent accidents and injuries. Enjoy your newly assembled AR15 and happy shooting!