“Precision starts with zeroing your AR-15”
Proper Equipment for Zeroing Your AR-15
When it comes to shooting accurately with your AR-15, one of the most important steps you can take is to properly zero your rifle. Zeroing your AR-15 ensures that your shots will hit where you aim, which is crucial for hunting, target shooting, or self-defense. In this article, we will discuss the proper equipment you will need to zero your AR-15 for accuracy.
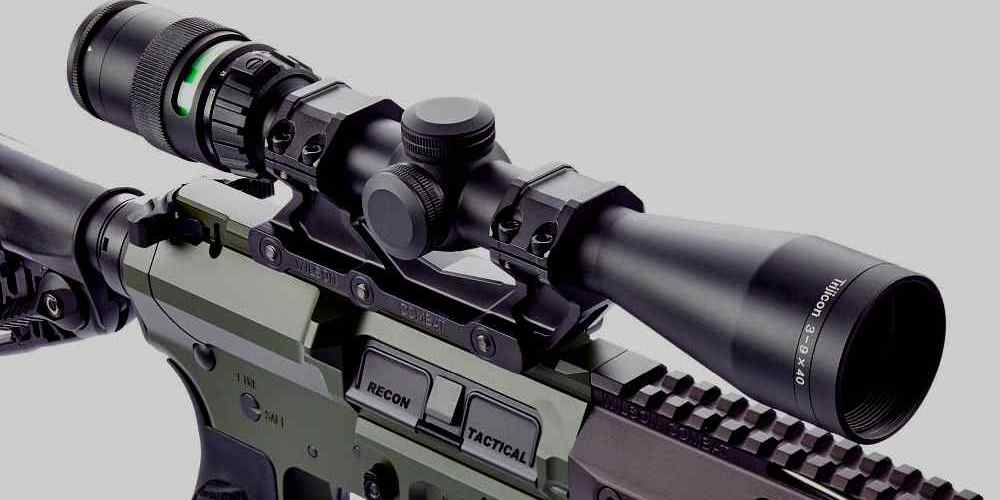
The first piece of equipment you will need is a quality optic. Whether you prefer a red dot sight, a holographic sight, or a traditional scope, having a reliable optic is essential for zeroing your AR-15. Make sure your optic is properly mounted and securely attached to your rifle before you begin the zeroing process.
Next, you will need a stable shooting platform. This could be a shooting bench, a bipod, or sandbags to support your rifle while you zero it. A stable shooting platform will help you eliminate any inconsistencies in your shooting technique and ensure that your shots are as accurate as possible.
You will also need a good supply of ammunition. It is recommended to use the same type of ammunition that you will be using for your intended purpose, whether that is hunting, target shooting, or self-defense. Using consistent ammunition will help you achieve a more accurate zero for your AR-15.
Another important piece of equipment for zeroing your AR-15 is a reliable shooting rest. A shooting rest will help you stabilize your rifle and eliminate any human error in your shooting technique. This will allow you to focus on the zeroing process and ensure that your shots are hitting where you aim.
Lastly, you will need a target to shoot at. There are many different types of targets available, from simple paper targets to reactive steel targets. Choose a target that is appropriate for the distance at which you will be zeroing your AR-15 and make sure it is securely attached to a target stand or backer.
Now that you have all the necessary equipment, it’s time to zero your AR-15 for accuracy. Start by setting up your shooting platform and ensuring that your rifle is securely supported. Take aim at your target and fire a few shots to get a feel for where your rifle is hitting.
Once you have established a baseline, adjust your optic’s windage and elevation settings to bring your shots closer to the center of the target. Make small adjustments and continue to fire shots until your groups are consistently hitting where you aim.
Remember to take your time and be patient during the zeroing process. It may take several rounds of adjustments before you achieve the desired zero for your AR-15. Once you are satisfied with your zero, make sure to record your settings so you can easily return to them in the future.
In conclusion, properly zeroing your AR-15 is essential for shooting accurately. By using the proper equipment and following a systematic approach, you can ensure that your shots will hit where you aim every time. Take the time to zero your AR-15 correctly, and you will see a significant improvement in your shooting accuracy.
Step-by-Step Guide to Zeroing Your AR-15
If you own an AR-15 rifle, you know how important accuracy is when it comes to hitting your target. Whether you are a seasoned shooter or a beginner, properly zeroing your AR-15 is essential for achieving consistent and precise shots. In this step-by-step guide, we will walk you through the process of zeroing your AR-15 for accuracy.
The first step in zeroing your AR-15 is to ensure that your rifle is properly set up for the task. Make sure that your rifle is clean and in good working condition. Check that your scope or sights are securely mounted and properly aligned. It is also important to use high-quality ammunition that is consistent and reliable.
Once you have confirmed that your rifle is ready, find a safe and controlled shooting range where you can zero your AR-15. Set up your target at a distance that is appropriate for the type of shooting you will be doing. A common distance for zeroing an AR-15 is 100 yards, but this can vary depending on your preferences and shooting style.
Next, take a few shots to get a feel for how your rifle is performing. This will help you determine if any adjustments need to be made before zeroing your AR-15. Pay attention to where your shots are landing in relation to your target, as this will give you valuable information about how your rifle is currently zeroed.
To begin zeroing your AR-15, start by adjusting your scope or sights so that your shots are hitting the center of your target. This process may require some trial and error, so be patient and make small adjustments as needed. Remember that it is better to make small adjustments and take your time than to rush through the process and end up with an inaccurate zero.
Once you have your shots consistently hitting the center of your target, it is time to fine-tune your zero. This involves making adjustments to ensure that your shots are landing exactly where you want them to. Take your time with this step, as even small adjustments can have a significant impact on your accuracy.
As you continue to zero your AR-15, pay attention to how changes in wind, temperature, and other environmental factors affect your shots. These variables can have a big impact on your accuracy, so it is important to be aware of them and make any necessary adjustments.
Once you are satisfied with your zero, take the time to confirm that your rifle is properly zeroed. This can be done by shooting a few groups of shots and checking that they are consistently hitting the center of your target. If you are happy with the results, congratulations – you have successfully zeroed your AR-15 for accuracy.
In conclusion, zeroing your AR-15 is a crucial step in achieving accuracy and consistency with your rifle. By following this step-by-step guide and taking the time to properly zero your AR-15, you can ensure that you are hitting your target with precision every time. Remember to be patient, make small adjustments as needed, and pay attention to environmental factors that may affect your shots. With practice and dedication, you can become a skilled and accurate shooter with your AR-15.
Importance of Consistent Shooting Technique for Accuracy
When it comes to shooting accuracy with your AR-15, there are a few key factors to consider. One of the most important aspects of achieving accuracy is having a consistent shooting technique. Consistency in your shooting technique can greatly impact the accuracy of your shots, so it’s crucial to develop good habits and stick to them.
One of the first things to consider when trying to improve your shooting accuracy is your stance. Your stance plays a significant role in how steady you are when taking a shot. Make sure your feet are shoulder-width apart, with your weight evenly distributed between them. Your body should be slightly forward, with a slight bend in your knees. This stance will help you absorb recoil and maintain stability while shooting.
Next, focus on your grip. A proper grip on your AR-15 is essential for accuracy. Make sure your dominant hand is high on the grip, with your fingers wrapped around it firmly. Your support hand should be placed under the handguard, providing additional support and stability. Practice gripping your rifle consistently to ensure a steady hold each time you shoot.
Breathing control is another crucial aspect of shooting accuracy. When taking a shot, it’s important to control your breathing to minimize movement and maintain stability. Take a deep breath, exhale halfway, and hold your breath while taking the shot. This will help reduce any movement caused by breathing and improve your accuracy.
Trigger control is also vital for accuracy. A smooth trigger pull is essential to prevent jerking or flinching, which can throw off your shot. Practice squeezing the trigger slowly and steadily, focusing on a smooth motion. This will help ensure a consistent trigger pull each time you shoot, leading to improved accuracy.
Consistency in your shooting technique is key to achieving accuracy with your AR-15. By focusing on your stance, grip, breathing control, and trigger pull, you can develop good habits that will improve your shooting accuracy over time. Remember to practice regularly to reinforce these techniques and make them second nature.
In addition to consistent shooting technique, zeroing your AR-15 is essential for accuracy. Zeroing your rifle ensures that your shots hit the intended target at a specific distance. To zero your AR-15, you’ll need to adjust the sights or optics to align with where your shots are landing.
Start by setting up a target at your desired zeroing distance. Fire a group of shots at the target to determine where your shots are hitting. Use a spotting scope or binoculars to see where your shots are landing in relation to the target.
Next, adjust your sights or optics to bring your shots to the center of the target. This may require adjusting windage and elevation settings to align with where your shots are landing. Make small adjustments and continue firing groups of shots until your shots consistently hit the center of the target.
Once you have zeroed your AR-15, it’s important to confirm your zero periodically to ensure it remains accurate. Factors such as temperature, humidity, and ammunition can affect your zero, so it’s essential to check it regularly.
By focusing on consistent shooting technique and zeroing your AR-15, you can improve your shooting accuracy and become a more proficient shooter. Practice regularly, pay attention to detail, and make adjustments as needed to achieve the best results. With dedication and effort, you can become a skilled marksman with your AR-15.
Understanding MOA and Adjusting Your Sights
If you own an AR-15 rifle, you likely want to ensure that it is zeroed for accuracy. Zeroing your rifle is essential for hitting your target consistently and effectively. In this article, we will discuss how to zero your AR-15 for accuracy, focusing on understanding MOA and adjusting your sights.
First, let’s talk about MOA, which stands for Minute of Angle. MOA is a unit of measurement used to describe the accuracy of a rifle. One MOA is equal to 1.047 inches at 100 yards. This means that if your rifle is shooting 1 MOA groups at 100 yards, it is capable of hitting a target within a 1-inch diameter circle at that distance.
When zeroing your AR-15, you will want to adjust your sights to ensure that your shots are hitting the center of your target consistently. To do this, you will need to understand how to make adjustments to your sights. Most AR-15 rifles come equipped with adjustable iron sights or optics that allow you to make windage (horizontal) and elevation (vertical) adjustments.
To adjust your sights, you will need to shoot a group of shots at a target and determine where your shots are hitting in relation to your point of aim. If your shots are hitting to the left of your point of aim, you will need to adjust your windage to the right. If your shots are hitting above your point of aim, you will need to adjust your elevation down.
When making adjustments to your sights, it is important to remember that each click of your sight adjustment corresponds to a specific measurement. Most sights are calibrated in 1/4 MOA increments, meaning that each click will move your point of impact 1/4 inch at 100 yards. This allows you to make precise adjustments to your sights to zero your rifle for accuracy.
Once you have made the necessary adjustments to your sights, you will want to shoot another group of shots at your target to confirm that your rifle is zeroed. If your shots are hitting consistently at the center of your target, congratulations – you have successfully zeroed your AR-15 for accuracy!
It is important to note that zeroing your rifle is not a one-time process. Factors such as ammunition, environmental conditions, and shooting position can all affect the point of impact of your shots. It is recommended to periodically check and adjust your zero to ensure that your rifle is always shooting accurately.
In conclusion, zeroing your AR-15 for accuracy is a crucial step in ensuring that you can hit your target consistently and effectively. By understanding MOA and how to adjust your sights, you can make precise adjustments to zero your rifle for accuracy. Remember to periodically check and adjust your zero to account for changing conditions and maintain optimal accuracy. Happy shooting!
Tips for Maintaining Your AR-15 Zero Over Time
If you own an AR-15, you know how important it is to maintain accuracy when shooting. One key aspect of accuracy is ensuring that your rifle is properly zeroed. Zeroing your AR-15 is the process of adjusting the sights so that the point of aim matches the point of impact at a specific distance. This ensures that your shots will hit where you intend them to. In this article, we will discuss some tips for zeroing your AR-15 for accuracy and how to maintain that zero over time.
The first step in zeroing your AR-15 is to choose a distance at which you want to zero your rifle. The most common distance for zeroing an AR-15 is 100 yards, but you can choose a different distance depending on your shooting needs. Once you have chosen your zero distance, you will need to adjust your sights to ensure that your shots hit the target at that distance.
To zero your AR-15, start by setting up a target at your chosen distance. Take a few shots to see where your shots are hitting in relation to where you are aiming. If your shots are hitting to the left or right of your point of aim, you will need to adjust the windage on your sights. If your shots are hitting above or below your point of aim, you will need to adjust the elevation on your sights.
When making adjustments to your sights, it is important to make small changes and then test your rifle again to see if your shots are hitting where you want them to. It may take several adjustments to get your rifle properly zeroed, so be patient and take your time.
Once you have zeroed your AR-15, it is important to regularly check and maintain your zero over time. Your zero can shift due to a variety of factors, such as changes in temperature, humidity, or even just normal wear and tear on your rifle. To ensure that your zero stays accurate, it is a good idea to check it periodically and make any necessary adjustments.
One way to maintain your zero is to keep a log of your shooting sessions. Note the conditions in which you are shooting, such as temperature, humidity, and wind speed. This can help you identify any patterns that may be affecting your zero and make adjustments accordingly.
Another way to maintain your zero is to regularly clean and inspect your rifle. Dirt, debris, and fouling can affect the accuracy of your shots, so it is important to keep your rifle clean and well-maintained. Check your sights for any signs of damage or wear, and replace them if necessary.
In conclusion, zeroing your AR-15 for accuracy is an important step in ensuring that your shots hit where you intend them to. By following the tips outlined in this article, you can zero your rifle effectively and maintain that zero over time. Remember to be patient and take your time when zeroing your rifle, and regularly check and maintain your zero to ensure that your shots stay on target.