“Empower your firearm with custom DIY accessories.”
Customizing Your Rifle Stock
Are you looking to add a personal touch to your rifle? Customizing your rifle stock is a great way to make your firearm stand out and reflect your unique style. With a few simple tools and some creativity, you can transform your plain stock into a one-of-a-kind masterpiece. In this article, we will guide you through the process of customizing your rifle stock with DIY projects.
The first step in customizing your rifle stock is to decide on a design. Whether you prefer a classic wood finish, a sleek matte black look, or a bold camouflage pattern, the possibilities are endless. Take some time to browse online for inspiration and gather ideas for your project. Once you have a clear vision in mind, it’s time to gather your materials.
To get started, you will need sandpaper, paint or stain, a paintbrush, masking tape, and a clear coat finish. Begin by sanding down the surface of your rifle stock to remove any existing finish and create a smooth base for your new design. Be sure to sand in the direction of the grain to avoid damaging the wood.
Next, use masking tape to create a design or pattern on your rifle stock. This could be as simple as painting the entire stock a solid color, or as intricate as creating a camouflage pattern with multiple colors. Once you have your design in place, carefully apply the paint or stain with a paintbrush, making sure to cover the entire surface evenly.
After the paint has dried, remove the masking tape to reveal your custom design. If you are happy with the results, you can apply a clear coat finish to protect the paint and give your rifle stock a professional-looking finish. Allow the clear coat to dry completely before reassembling your rifle.
If you are feeling more adventurous, you can also add additional customizations to your rifle stock. Consider adding a rubber recoil pad for added comfort, or attaching a sling swivel for easy carrying. You could also engrave your initials or a special symbol onto the stock for a truly personalized touch.
When customizing your rifle stock, it’s important to take your time and pay attention to detail. Small mistakes can be easily fixed with a bit of sanding and touch-up paint, but it’s best to avoid them altogether by working carefully and methodically. Remember, this is your chance to make your rifle truly your own, so don’t be afraid to get creative and experiment with different techniques.
In conclusion, customizing your rifle stock with DIY projects is a fun and rewarding way to add a personal touch to your firearm. With a little time and effort, you can transform your plain stock into a work of art that reflects your unique style and personality. So grab your tools and get started on your next DIY project today!
Crafting Your Own Gun Holster
Are you a gun enthusiast looking to add a personal touch to your firearm accessories? Building your own gun holster can be a rewarding DIY project that allows you to customize the design and functionality to suit your needs. Whether you’re a seasoned crafter or a beginner looking to try your hand at a new skill, creating your own gun holster can be a fun and fulfilling endeavor.
To get started, you’ll need to gather the necessary materials and tools. Depending on the type of holster you want to make, you may need leather, Kydex, or other materials commonly used in holster construction. You’ll also need a heat gun, rivets, a holster mold, and other basic crafting supplies. Once you have everything you need, it’s time to start building your holster.
Begin by cutting out the pattern for your holster from the chosen material. Make sure to measure your gun accurately to ensure a proper fit. Once you have the pattern cut out, use the heat gun to mold the material to the shape of your gun. Be sure to heat the material evenly and slowly to avoid warping or damaging it.
Next, use rivets or other fasteners to secure the edges of the holster together. Make sure the seams are strong and secure to prevent the holster from coming apart during use. You may also want to add additional features such as a retention strap or adjustable belt loops to customize the holster to your liking.
As you work on your holster, don’t be afraid to experiment with different designs and techniques. Building your own gun holster is a creative process that allows you to express your individual style and preferences. Try adding decorative elements such as tooling or stamping to give your holster a unique look.
Once your holster is complete, be sure to test it out with your gun to ensure a proper fit and functionality. Make any necessary adjustments to the fit or design to ensure that your gun is secure and easily accessible. Remember, safety is always the top priority when it comes to gun accessories, so be sure to test your holster thoroughly before using it regularly.
Building your own gun holster is a fun and rewarding DIY project that allows you to create a custom accessory for your firearm. Whether you’re looking to add a personal touch to your gear or simply enjoy working with your hands, crafting your own gun holster can be a fulfilling experience. So gather your materials, fire up your heat gun, and get ready to build a holster that’s as unique as you are.
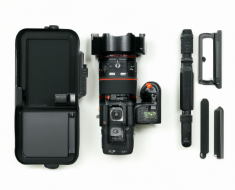
Building a DIY Gun Cleaning Kit
If you’re a gun enthusiast, you know the importance of keeping your firearms clean and well-maintained. A clean gun not only performs better but also lasts longer. While there are many gun cleaning kits available on the market, building your own DIY gun cleaning kit can be a fun and rewarding project. Not only will you save money, but you’ll also have the satisfaction of knowing that you customized your kit to suit your specific needs.
The first step in building your DIY gun cleaning kit is to gather all the necessary supplies. You’ll need a cleaning rod, bore brushes, patches, cleaning solvent, lubricating oil, and a cleaning mat. You may also want to include some additional tools such as a toothbrush, cotton swabs, and a cleaning pick. These items can be easily found at your local gun store or online.
Once you have all your supplies, it’s time to assemble your kit. Start by organizing your supplies in a convenient and easily accessible container. A tackle box or a tool bag works well for this purpose. Make sure to label each compartment so you can quickly find what you need when cleaning your gun.
Next, assemble your cleaning rod and attach the appropriate bore brush for your gun’s caliber. Run the brush through the barrel several times to remove any fouling or debris. Follow up with a few patches soaked in cleaning solvent to further clean the barrel. Be sure to use a separate patch for each pass to avoid re-contaminating the barrel.
After cleaning the barrel, it’s important to lubricate the moving parts of your gun to ensure smooth operation. Apply a small amount of lubricating oil to the slide, trigger, and other moving parts. Be careful not to over-lubricate as this can attract dirt and debris.
In addition to cleaning your gun, it’s also important to protect it from rust and corrosion. A silicone cloth or rust inhibitor can help prevent moisture from damaging your firearm. Be sure to wipe down your gun with a silicone cloth after cleaning and before storing it.
Building your own DIY gun cleaning kit is a great way to take ownership of your firearm maintenance. Not only will you save money in the long run, but you’ll also have the satisfaction of knowing that you’re taking proper care of your investment. Plus, customizing your kit allows you to tailor it to your specific needs and preferences.
In conclusion, building a DIY gun cleaning kit is a rewarding project for any gun enthusiast. By gathering the necessary supplies, organizing them in a convenient container, and following proper cleaning and maintenance procedures, you can ensure that your firearms are always in top condition. So why not give it a try and build your own DIY gun cleaning kit today? Your guns will thank you for it.
Making Your Own Ammo Pouches
Are you a gun enthusiast looking to add a personal touch to your firearm accessories? Building your own gun accessories can be a rewarding and cost-effective way to customize your gear. In this article, we will focus on making your own ammo pouches, a practical and essential accessory for any gun owner.
When it comes to ammo pouches, there are a variety of styles and designs to choose from. Whether you prefer a traditional belt-mounted pouch or a more modern molle-compatible option, making your own allows you to tailor the pouch to your specific needs and preferences.
To get started, you will need a few basic materials and tools. A sturdy fabric such as canvas or nylon is ideal for making an ammo pouch that can withstand the rigors of regular use. You will also need a sewing machine, thread, scissors, and any additional hardware such as snaps or buckles.
Begin by measuring and cutting the fabric to the desired size and shape of your ammo pouch. Be sure to leave extra material for seam allowances. Next, fold the edges of the fabric over and sew them in place to create a clean and durable finish. This will also prevent fraying and ensure that your pouch holds up over time.
Once the basic structure of the pouch is complete, you can add any additional features or embellishments to customize the design. This could include extra pockets for storing accessories, adjustable straps for a comfortable fit, or even a padded lining for added protection.
When it comes to attaching the pouch to your belt or gear, there are a few different options to consider. You could sew on belt loops for a more permanent attachment, or use molle straps for a more versatile and modular setup. Whichever method you choose, be sure to test the pouch for fit and functionality before heading out to the range.
Making your own ammo pouches not only allows you to create a personalized accessory that suits your needs, but it also gives you a sense of pride and accomplishment in knowing that you crafted it yourself. Plus, DIY projects like this can be a fun and creative way to spend your time, whether you are an experienced crafter or just starting out.
In conclusion, building your own gun accessories, such as ammo pouches, is a great way to add a personal touch to your gear while also saving money. By following these simple steps and using your creativity and skills, you can create a custom ammo pouch that is both functional and stylish. So why not give it a try and see what you can come up with? Happy crafting!
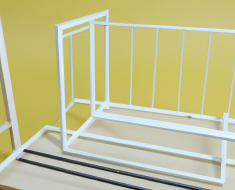
Designing and Constructing a Gun Rack
Are you a gun enthusiast looking to add a personal touch to your collection? Building your own gun accessories can be a rewarding and cost-effective way to customize your firearms. In this article, we will focus on designing and constructing a gun rack, a practical and stylish accessory that can help you organize and display your guns.
When it comes to building a gun rack, there are a few key considerations to keep in mind. First and foremost, safety should always be your top priority. Make sure to use sturdy materials that can support the weight of your firearms and secure them in place to prevent accidents. Additionally, consider the size and layout of your gun collection to determine the best design for your gun rack.
One popular option for a DIY gun rack is a wall-mounted rack. This type of rack can be easily customized to fit your space and can provide a convenient and accessible way to store your guns. To build a wall-mounted gun rack, you will need to measure the dimensions of your guns and determine the spacing needed between each slot. Once you have your measurements, you can cut slots into a piece of wood or metal to create a secure and organized display for your firearms.
Another option for a DIY gun rack is a freestanding rack. This type of rack can be a great choice if you have limited wall space or if you want to showcase your guns in a more prominent location. To build a freestanding gun rack, you can use materials such as wood or PVC pipe to create a sturdy and stylish display for your firearms. Consider adding shelves or compartments to store ammunition or accessories alongside your guns.
No matter which type of gun rack you choose to build, there are a few tips to keep in mind to ensure a successful project. Make sure to sand and finish your rack to prevent splinters or rough edges that could damage your guns. Additionally, consider adding padding or felt lining to protect the finish of your firearms and prevent scratches or dings.
Building your own gun rack can be a fun and rewarding project that allows you to showcase your creativity and craftsmanship. Whether you are a seasoned DIY enthusiast or a beginner looking to try your hand at woodworking, designing and constructing a gun rack can be a great way to personalize your gun collection and add a touch of flair to your space.
In conclusion, DIY projects like building your own gun accessories can be a great way to customize your firearms and add a personal touch to your collection. Designing and constructing a gun rack can be a practical and stylish way to organize and display your guns while showcasing your creativity and craftsmanship. So why not roll up your sleeves, grab your tools, and get started on building your own gun rack today? Your guns will thank you for it!