“Overcome any obstacle with our AR15 repair tips for charging handle challenges.”
Proper Maintenance and Cleaning Techniques for AR15 Charging Handles
If you own an AR15 rifle, you know how important it is to keep it properly maintained and cleaned. One crucial component that often gets overlooked is the charging handle. The charging handle is responsible for chambering a round into the rifle and cocking the hammer. Without a functioning charging handle, your AR15 won’t be able to fire properly. In this article, we will discuss some common challenges that arise with AR15 charging handles and provide you with some tips on how to repair and maintain them.
One of the most common issues with AR15 charging handles is wear and tear. Over time, the charging handle can become loose or start to malfunction. This can be caused by a variety of factors, including dirt and debris buildup, improper installation, or simply old age. If you notice that your charging handle is not functioning properly, it’s important to address the issue as soon as possible to prevent any further damage to your rifle.
To repair a loose or malfunctioning charging handle, the first step is to disassemble it from the rifle. This can be done by removing the upper receiver from the lower receiver and then removing the charging handle from the upper receiver. Once the charging handle is removed, inspect it for any visible damage or wear. If you notice any cracks, bends, or other signs of damage, it may be time to replace the charging handle altogether.
If the charging handle appears to be in good condition, the next step is to clean it thoroughly. Use a solvent or cleaning solution to remove any dirt, debris, or buildup that may be causing the charging handle to malfunction. Be sure to pay special attention to the grooves and moving parts of the charging handle, as these are the areas most prone to dirt and debris buildup.
After cleaning the charging handle, it’s important to lubricate it properly. Apply a small amount of gun oil or lubricant to the moving parts of the charging handle to ensure smooth operation. Be sure to wipe away any excess oil to prevent it from attracting dirt and debris.
Once the charging handle has been cleaned and lubricated, reassemble it back onto the rifle. Make sure that it is properly aligned and seated in the upper receiver before reattaching the upper receiver to the lower receiver. Test the charging handle to ensure that it is functioning properly before using your rifle.
In addition to regular cleaning and maintenance, there are a few other tips to keep in mind when it comes to AR15 charging handles. Avoid using excessive force when operating the charging handle, as this can cause unnecessary wear and tear. Additionally, be sure to store your rifle in a clean and dry environment to prevent dirt and debris from accumulating on the charging handle.
By following these tips and properly maintaining your AR15 charging handle, you can ensure that your rifle functions properly and reliably. Remember to inspect your charging handle regularly for any signs of wear or damage, and address any issues promptly to prevent further damage. With proper care and maintenance, your AR15 charging handle will continue to serve you well for years to come.
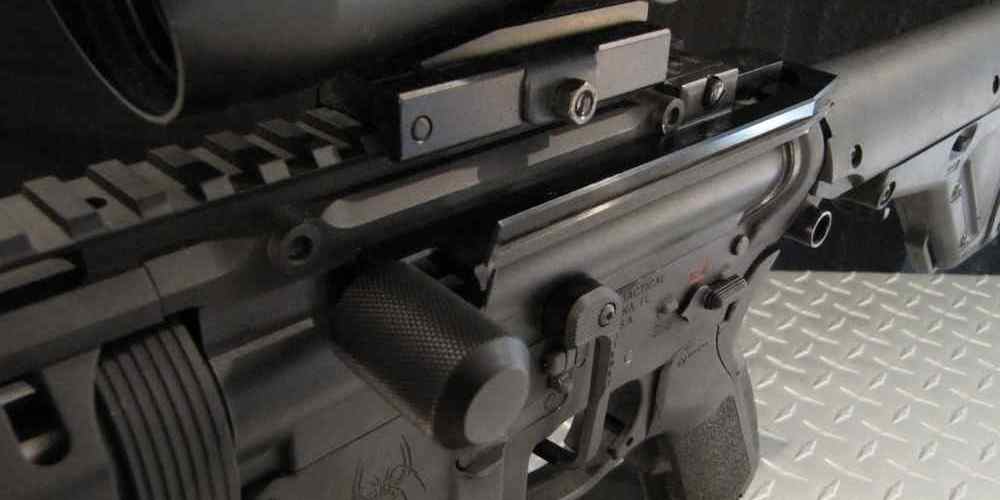
Common Issues with AR15 Charging Handles and How to Troubleshoot Them
The AR15 is a popular rifle among gun enthusiasts for its reliability and versatility. However, like any mechanical device, it can experience issues that require troubleshooting and repair. One common problem that AR15 owners may encounter is with the charging handle. The charging handle is a critical component of the rifle that allows the user to chamber a round and cock the weapon. When the charging handle malfunctions, it can prevent the rifle from functioning properly. In this article, we will discuss some common issues with AR15 charging handles and provide tips on how to troubleshoot and repair them.
One of the most common issues with AR15 charging handles is a failure to lock back. This can occur for a variety of reasons, including a worn or damaged latch, a dirty or obstructed channel, or improper installation. If your charging handle is not locking back when the rifle is empty, the first step is to check for any visible damage or wear on the latch. If the latch appears to be in good condition, try cleaning the channel with a solvent and a brush to remove any debris that may be preventing it from locking back properly. If the issue persists, you may need to replace the latch or seek professional assistance.
Another common issue with AR15 charging handles is a failure to cycle smoothly. This can be caused by a variety of factors, including a dirty or dry channel, excessive friction, or misalignment. If your charging handle is difficult to cycle, try cleaning and lubricating the channel to reduce friction. If the issue persists, check for any visible signs of wear or damage on the handle itself. If the handle appears to be in good condition, try adjusting the alignment to ensure that it moves smoothly within the channel. If the problem continues, you may need to replace the charging handle or seek professional assistance.
One final issue that AR15 owners may encounter with their charging handles is a failure to latch properly. This can be caused by a variety of factors, including a worn or damaged latch, a misaligned handle, or improper installation. If your charging handle is not latching properly, the first step is to check for any visible signs of wear or damage on the latch. If the latch appears to be in good condition, try adjusting the alignment of the handle to ensure that it latches securely. If the issue persists, you may need to replace the latch or seek professional assistance.
In conclusion, the charging handle is a critical component of the AR15 rifle that can experience a variety of issues. By understanding common problems with AR15 charging handles and following these troubleshooting tips, you can keep your rifle in top condition and ensure reliable performance. Remember to always follow proper safety procedures when working on your firearm and seek professional assistance if you are unsure of how to address a particular issue. With proper care and maintenance, your AR15 charging handle should provide years of reliable service.
Upgrading Your AR15 Charging Handle for Improved Performance
If you own an AR15 rifle, you know how important it is to keep it in top working condition. One of the key components of the AR15 is the charging handle, which is responsible for chambering a round and cocking the rifle. However, like any mechanical part, the charging handle can wear out over time and may need to be replaced or upgraded for improved performance.
One common issue that AR15 owners face is a loose or wobbly charging handle. This can be caused by a variety of factors, including wear and tear, improper installation, or a low-quality charging handle. If you notice that your charging handle is loose or wobbly, it’s important to address the issue as soon as possible to prevent further damage to your rifle.
One simple solution to a loose charging handle is to tighten the screws that hold it in place. Most charging handles are secured to the upper receiver with two screws, which can come loose over time. To tighten the screws, simply use a screwdriver to tighten them until they are snug. Be careful not to over-tighten the screws, as this can cause damage to the threads or the charging handle itself.
If tightening the screws doesn’t solve the problem, you may need to replace the charging handle with a new one. There are many aftermarket charging handles available that are designed to be more durable and reliable than the stock charging handle. Look for a charging handle that is made from high-quality materials, such as aluminum or steel, and has a solid construction to ensure long-lasting performance.
Another common issue with AR15 charging handles is difficulty in operating the handle, especially when wearing gloves or in high-stress situations. This can be caused by a lack of grip on the charging handle, which can make it difficult to pull back and chamber a round. To improve the grip on your charging handle, consider upgrading to a charging handle with an extended latch or oversized handle. These features make it easier to operate the charging handle, even in challenging conditions.
In addition to upgrading your charging handle for improved performance, it’s also important to regularly clean and lubricate the charging handle to ensure smooth operation. Dirt, debris, and grime can build up on the charging handle over time, causing it to become sticky or difficult to operate. To clean your charging handle, simply remove it from the rifle and wipe it down with a clean cloth. Apply a small amount of gun oil or lubricant to the moving parts of the charging handle to keep it operating smoothly.
By addressing common charging handle challenges and following these AR15 repair tips, you can ensure that your rifle is always ready for action. Whether you choose to tighten the screws, upgrade to a new charging handle, or simply clean and lubricate the existing charging handle, taking care of this important component will help you get the most out of your AR15 rifle. With a reliable and well-maintained charging handle, you can enjoy improved performance and peace of mind every time you take your rifle to the range.
Tips for Installing a New Charging Handle on Your AR15
If you own an AR15 rifle, you know how important the charging handle is for proper operation. The charging handle is responsible for chambering a round, clearing malfunctions, and ensuring the rifle is ready to fire. Over time, the charging handle may wear out or become damaged, requiring replacement. In this article, we will discuss some tips for installing a new charging handle on your AR15.
Before you begin the installation process, it is important to ensure that you have the correct replacement charging handle for your AR15. There are many different types and styles of charging handles available on the market, so be sure to choose one that is compatible with your rifle. Once you have the correct charging handle, you can begin the installation process.
The first step in installing a new charging handle is to ensure that your rifle is unloaded and the safety is engaged. This will prevent any accidental discharges while you are working on the rifle. Next, you will need to remove the upper receiver from the lower receiver of the rifle. This can usually be done by pushing out the takedown pin and pivot pin, allowing the upper receiver to pivot open.
With the upper receiver open, you can access the charging handle and begin the removal process. Most charging handles are held in place by a roll pin or a screw. Use the appropriate tools to remove the pin or screw and carefully pull the charging handle out of the receiver. Be sure to keep track of any small parts or springs that may come loose during this process.
Once the old charging handle has been removed, you can begin installing the new one. Start by inserting the new charging handle into the receiver, making sure it is properly aligned and seated. Depending on the type of charging handle you have, you may need to reinsert a roll pin or screw to secure it in place. Use caution when reinserting any pins or screws to avoid damaging the charging handle or receiver.
After the new charging handle is securely in place, you can reassemble the upper and lower receivers of the rifle. Make sure the takedown pin and pivot pin are properly aligned and seated, and then close the upper receiver. Finally, perform a function check to ensure the charging handle operates smoothly and the rifle functions properly.
In conclusion, installing a new charging handle on your AR15 rifle is a relatively simple process that can be done at home with the right tools and knowledge. By following these tips and taking your time, you can ensure that your rifle is ready for action with a new charging handle installed. Remember to always practice proper firearm safety and consult a professional gunsmith if you are unsure about any aspect of the installation process. With a new charging handle in place, your AR15 will be ready for whatever challenges come its way.
Best Practices for Extending the Lifespan of Your AR15 Charging Handle
If you own an AR15 rifle, you know how important it is to keep all of its components in top working condition. One crucial part of the AR15 that often gets overlooked is the charging handle. The charging handle is responsible for chambering a round into the rifle and cocking the hammer. Without a properly functioning charging handle, your AR15 won’t be able to fire.
One common issue that AR15 owners face with their charging handles is wear and tear. Over time, the charging handle can become loose or even break, making it difficult to operate the rifle. Fortunately, there are some simple steps you can take to extend the lifespan of your AR15 charging handle and keep it in good working condition.
One of the best ways to prevent wear and tear on your charging handle is to regularly clean and lubricate it. Dirt, debris, and grime can build up in the charging handle, causing it to become stiff and difficult to operate. By cleaning the charging handle with a solvent and then applying a light coat of lubricant, you can keep it running smoothly and prevent premature wear.
Another common issue with AR15 charging handles is the latch mechanism becoming loose or worn out. The latch is what holds the charging handle in place when not in use, and if it becomes loose, the charging handle can rattle or even fall out of the rifle. To prevent this from happening, regularly check the latch for any signs of wear or damage and replace it if necessary.
If you do find that your charging handle is loose or not functioning properly, don’t panic. There are several ways you can repair or replace a faulty charging handle without having to take your rifle to a gunsmith. One option is to simply tighten the screws that hold the charging handle in place. If the screws are stripped or damaged, you can easily replace them with new ones.
If the latch mechanism is the issue, you can also replace it with a new one. Most AR15 charging handles are designed to be easily disassembled, allowing you to remove and replace the latch without too much trouble. Just make sure to follow the manufacturer’s instructions and use the proper tools to avoid damaging the charging handle.
In some cases, you may find that your charging handle is beyond repair and needs to be replaced entirely. Fortunately, there are many aftermarket charging handles available that are designed to fit AR15 rifles. When choosing a replacement charging handle, make sure to select one that is made from high-quality materials and is compatible with your specific AR15 model.
By taking the time to properly maintain and care for your AR15 charging handle, you can extend its lifespan and ensure that your rifle continues to function properly. Regular cleaning, lubrication, and inspection are key to preventing wear and tear on the charging handle. If you do encounter any issues, don’t hesitate to repair or replace the charging handle to keep your AR15 in top working condition. With these tips and best practices, you can enjoy many years of reliable use from your AR15 charging handle.


