Crafting precision, one step at a time.
Selecting the Right Blank for Your Rifle Stock
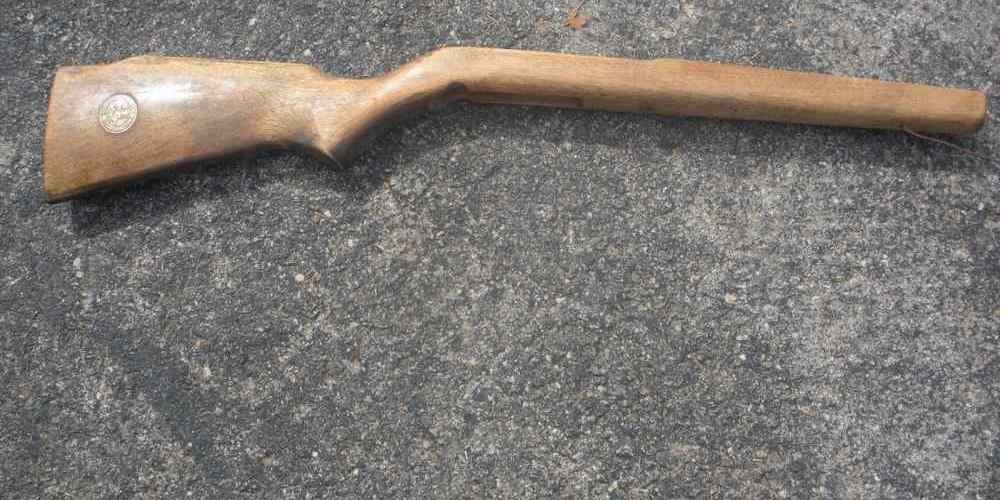
When it comes to creating a custom rifle stock, one of the most important steps is selecting the right blank. The blank is the raw piece of wood that will be shaped and carved to fit your rifle. Choosing the right blank is crucial, as it will determine the final look and feel of your stock.
There are a few key factors to consider when selecting a blank for your rifle stock. The first thing to think about is the type of wood you want to use. Different types of wood have different characteristics, so it’s important to choose a wood that will work well for your specific needs. Some popular choices for rifle stocks include walnut, maple, and cherry.
Once you’ve decided on the type of wood you want to use, the next step is to consider the grain pattern of the blank. The grain pattern of the wood will affect the strength and stability of the stock, as well as its overall appearance. Look for a blank with a straight, even grain pattern for the best results.
Another important factor to consider when selecting a blank is the size and shape of the piece. Make sure the blank is large enough to accommodate the design of your rifle stock, and that it has enough material to allow for shaping and carving. It’s also a good idea to choose a blank that is free of knots, cracks, and other imperfections that could affect the final product.
Once you’ve found the perfect blank for your rifle stock, it’s time to start shaping and carving. This process can be time-consuming and requires a steady hand, but with the right tools and techniques, you can create a beautiful and functional stock for your rifle.
Start by marking out the shape of the stock on the blank, using a template or drawing as a guide. Carefully cut away excess material using a bandsaw or jigsaw, being sure to leave enough material for shaping and sanding later on. Once you have the basic shape of the stock roughed out, it’s time to start shaping the contours and curves of the stock.
Use a combination of hand tools and power tools to shape the stock, being careful to remove material slowly and evenly to avoid any mistakes. Pay close attention to the lines and curves of the stock, making sure to create a smooth and even surface. Once you’re happy with the shape of the stock, it’s time to start sanding.
Start with a coarse grit sandpaper to remove any rough spots or imperfections, then gradually work your way up to a finer grit sandpaper to smooth out the surface of the stock. Take your time with this step, as a smooth finish is essential for a professional-looking stock.

Once you’ve finished sanding, you can apply a finish to the stock to protect the wood and enhance its appearance. There are many different finishes available, including oils, stains, and varnishes, so choose one that suits your preferences and the type of wood you’re using.
Creating a rifle stock from a blank is a challenging but rewarding process that allows you to customize your rifle to your exact specifications. By selecting the right blank and using the proper tools and techniques, you can create a stock that is both functional and beautiful. So take your time, be patient, and enjoy the process of creating your own custom rifle stock.
Rough Shaping the Blank to Fit Your Rifle
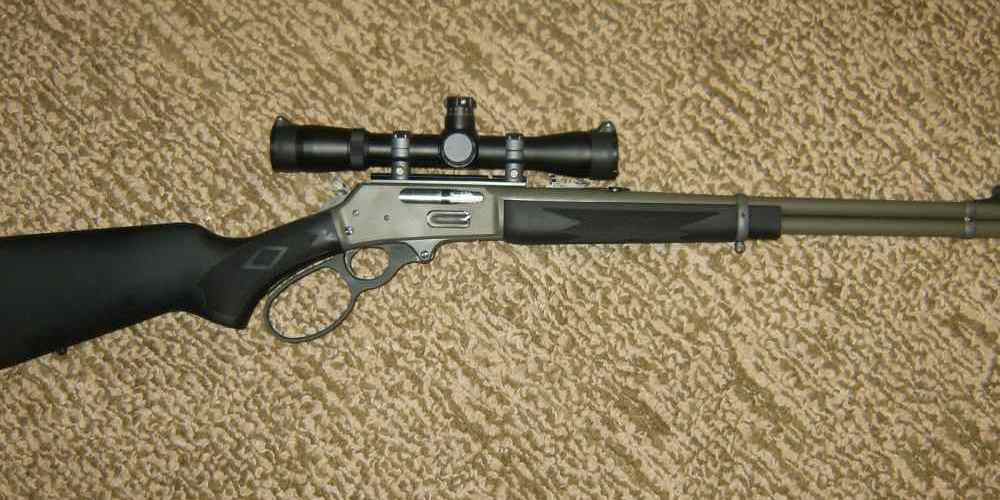
When it comes to customizing your rifle, one of the most important components to consider is the stock. A well-fitted stock can greatly improve your shooting accuracy and overall comfort while handling your firearm. While there are many options available on the market, creating a rifle stock from a blank allows you to tailor the stock to your specific needs and preferences. In this article, we will walk you through the process of rough shaping a blank to fit your rifle.
The first step in creating a rifle stock from a blank is selecting the right blank for your project. Rifle stock blanks are typically made from high-quality hardwoods such as walnut, maple, or cherry. When choosing a blank, look for one that is free of defects such as knots, cracks, or warping. It is also important to select a blank that is large enough to accommodate the dimensions of your rifle.
Once you have selected a suitable blank, the next step is to rough shape the blank to fit your rifle. Start by tracing the outline of your rifle’s action onto the blank using a pencil. This will serve as a guide for shaping the stock to fit your rifle. Next, use a bandsaw or jigsaw to cut out the rough shape of the stock, leaving some excess material around the edges to allow for further shaping.
After cutting out the rough shape of the stock, the next step is to begin shaping the stock to fit your rifle. This can be done using a combination of hand tools such as rasps, files, and sandpaper. Start by removing material from the stock to create the desired shape and contours. Pay close attention to the areas where the stock will come into contact with your shoulder and cheek, as these areas should be shaped for maximum comfort and stability.
As you shape the stock, periodically check the fit of the stock on your rifle to ensure that it is aligning properly with the action. Make any necessary adjustments to the stock to ensure a snug and secure fit. It is important to take your time during this process and work slowly and methodically to avoid removing too much material.
Once you are satisfied with the fit of the stock on your rifle, the next step is to sand the stock to a smooth finish. Start with a coarse grit sandpaper to remove any tool marks or rough spots, then gradually work your way up to a finer grit sandpaper to achieve a smooth and polished finish. Pay close attention to the details of the stock, such as the checkering and grip areas, to ensure a professional-looking final product.
In conclusion, creating a rifle stock from a blank is a rewarding and satisfying project that allows you to customize your rifle to your exact specifications. By following these steps for rough shaping a blank to fit your rifle, you can create a stock that is not only functional and comfortable but also a work of art. So grab a blank, some tools, and get started on creating the perfect stock for your rifle today.
Inletting the Action and Barrel Channel
When it comes to creating a custom rifle stock from a blank, one of the most crucial steps is inletting the action and barrel channel. This process involves carefully shaping the stock to accommodate the action and barrel of the rifle, ensuring a perfect fit and optimal performance. In this article, we will walk you through the steps involved in inletting the action and barrel channel of a rifle stock, providing you with a comprehensive guide to help you achieve professional results.
To begin the inletting process, you will need to carefully mark out the areas where the action and barrel will sit on the stock. This can be done using a pencil or chalk to outline the shape and dimensions of the action and barrel. Once you have marked out the areas, you can begin removing material from the stock to create the inletting.
The first step in inletting the action and barrel channel is to remove material from the stock using a chisel or router. Start by removing material from the center of the stock, working your way outwards towards the edges. Be sure to work slowly and carefully, checking the fit of the action and barrel regularly to ensure a precise fit.
As you remove material from the stock, be sure to leave enough material around the edges to provide support for the action and barrel. It is important to maintain a consistent depth and width throughout the inletting process to ensure a snug and secure fit for the action and barrel.
Once you have removed enough material to accommodate the action and barrel, you can begin shaping the inletting to match the contours of the action and barrel. This can be done using a variety of tools, such as rasps, files, and sandpaper, to carefully shape the inletting to match the shape of the action and barrel.
As you shape the inletting, be sure to check the fit of the action and barrel regularly to ensure a tight and secure fit. It is important to take your time and work slowly and carefully to achieve a precise fit that will provide optimal performance for your rifle.
Once you are satisfied with the fit of the action and barrel in the stock, you can begin finishing the inletting to ensure a professional and polished look. This can be done by sanding and smoothing the inletting to remove any rough edges or imperfections, creating a seamless transition between the stock and the action and barrel.
In conclusion, inletting the action and barrel channel of a rifle stock is a critical step in creating a custom rifle stock from a blank. By carefully marking out the areas, removing material, shaping the inletting, and finishing the inletting, you can achieve a precise fit that will provide optimal performance for your rifle. With patience and attention to detail, you can create a professional-quality rifle stock that will enhance the look and performance of your rifle.
Shaping the Stock for Comfort and Aesthetics
When it comes to creating a custom rifle stock from a blank, shaping the stock is a crucial step that can greatly impact the comfort and aesthetics of the final product. In this article, we will walk you through the process of shaping a rifle stock from a blank, step-by-step.
The first step in shaping the stock is to mark out the design on the blank. This involves tracing the outline of the stock onto the blank, as well as marking any areas that need to be removed or shaped. It’s important to take your time with this step, as the accuracy of your markings will directly impact the final shape of the stock.
Once you have marked out the design, it’s time to start removing material from the blank. This can be done using a variety of tools, such as a bandsaw, chisels, and rasps. It’s important to work slowly and carefully, removing small amounts of material at a time to avoid making any irreversible mistakes.
As you shape the stock, it’s important to keep comfort in mind. The stock should fit comfortably in your hand and shoulder, with no sharp edges or uncomfortable angles. Take the time to test the stock as you shape it, making adjustments as needed to ensure a comfortable fit.
In addition to comfort, aesthetics are also important when shaping a rifle stock. Take the time to smooth out any rough edges and shape the stock to your desired design. This can involve adding decorative elements, such as checkering or carving, to give the stock a unique and personalized look.
Throughout the shaping process, it’s important to constantly check your progress and make adjustments as needed. This may involve stepping back and looking at the stock from different angles, or testing the fit of the stock on your rifle. Don’t be afraid to make changes if something doesn’t look or feel right – it’s better to take the time to get it right now than to have to make major corrections later on.
Once you are happy with the shape of the stock, it’s time to sand and finish the wood. This involves using progressively finer grits of sandpaper to smooth out any rough spots and bring out the natural beauty of the wood. You can then apply a finish of your choice, such as oil or varnish, to protect the wood and give it a polished look.
In conclusion, shaping a rifle stock from a blank is a rewarding process that requires patience and attention to detail. By taking the time to mark out the design, remove material carefully, and pay attention to both comfort and aesthetics, you can create a custom rifle stock that is both functional and beautiful. So grab your tools and get shaping – your perfect rifle stock is just a few steps away.
Finishing and Sealing the Rifle Stock
Now that you have shaped and sanded your rifle stock to perfection, it’s time to move on to the next step in the process: finishing and sealing. This crucial step not only enhances the appearance of your stock but also protects it from the elements and ensures its longevity. In this article, we will guide you through the process of finishing and sealing your rifle stock, step by step.
The first step in finishing your rifle stock is to apply a wood conditioner. This will help to even out the absorption of the stain and ensure a smooth and consistent finish. Simply apply the wood conditioner with a brush or cloth, following the manufacturer’s instructions, and allow it to dry completely before moving on to the next step.
Once the wood conditioner has dried, it’s time to apply the stain. Choose a stain that complements the natural beauty of the wood and apply it evenly with a brush or cloth. Be sure to work in the direction of the grain and allow the stain to penetrate the wood for the recommended amount of time before wiping off any excess. You may need to apply multiple coats to achieve the desired color and depth of finish.
After the stain has dried, it’s time to seal the wood to protect it from moisture and wear. There are several options for sealing your rifle stock, including polyurethane, lacquer, and tung oil. Each has its own advantages and disadvantages, so be sure to choose the one that best suits your needs and preferences.
If you choose to use polyurethane, apply it in thin, even coats with a brush or cloth, allowing each coat to dry completely before applying the next. Sand lightly between coats to ensure a smooth finish. Lacquer can be applied in the same manner, but be sure to work in a well-ventilated area as it can be toxic if inhaled.
Tung oil is a popular choice for sealing rifle stocks as it provides a durable and water-resistant finish. Apply the tung oil with a brush or cloth, working it into the wood in a circular motion. Allow the oil to penetrate the wood for the recommended amount of time before wiping off any excess. You may need to apply multiple coats to achieve the desired level of protection.
Once you have applied the final coat of sealant, allow it to dry completely before handling or using your rifle stock. This will ensure that the finish is fully cured and will provide maximum protection for your stock. Congratulations, you have successfully finished and sealed your rifle stock!
In conclusion, finishing and sealing your rifle stock is a crucial step in the process of creating a beautiful and durable piece of equipment. By following these step-by-step instructions, you can achieve a professional-quality finish that will protect your stock for years to come. So grab your supplies and get started on finishing and sealing your rifle stock today!