How to Build a Reliable AR-15 From Scratch
Building your own AR-15 rifle from scratch can be a rewarding experience for gun enthusiasts and hobbyists alike. By customizing each component to your preferences, you can create a reliable and high-performance firearm that suits your needs. In this guide, we will walk you through the process of building a reliable AR-15 from scratch, covering everything from selecting the right parts to assembling the rifle.
1. Understanding the Basics of an AR-15
Before you start building your AR-15, it’s essential to have a good understanding of the basic components that make up the rifle. The AR-15 is a versatile and modular platform that allows for easy customization. Here are some of the key components you’ll need to consider:
- Upper Receiver: This is the top half of the rifle that houses the barrel, bolt carrier group, and handguard.
- Lower Receiver: This is the bottom half of the rifle that contains the trigger group and magazine well.
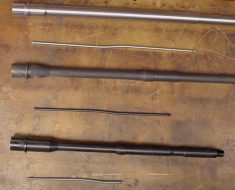
- Barrel: The barrel is where the bullet travels through, and its length and caliber will affect the rifle’s performance.
- Handguard: The handguard protects your hands from the hot barrel and allows you to attach accessories like lights or grips.
- Stock: The stock provides stability and comfort while shooting, and there are various options available, such as fixed or adjustable stocks.
2. Selecting High-Quality Parts
When building an AR-15, it’s crucial to choose high-quality parts to ensure reliability and performance. Here are some tips for selecting the right components:
- Research reputable manufacturers: Look for well-known brands with a track record of producing reliable AR-15 parts.
- Consider your budget: Decide how much you’re willing to spend on each component and prioritize quality over price.
- Read reviews: Check online reviews and forums to see what other builders have to say about specific parts.
3. Assembling Your AR-15
Once you’ve gathered all the necessary components, it’s time to start assembling your AR-15. Here’s a step-by-step guide to help you put together your rifle:
- Start by attaching the barrel to the upper receiver using a barrel nut wrench.
- Install the bolt carrier group into the upper receiver and ensure that it moves smoothly.
- Attach the handguard to the upper receiver, making sure it’s securely in place.
- Insert the lower parts kit into the lower receiver, including the trigger group and magazine release.
- Attach the upper receiver to the lower receiver using push pins or screws.
4. Testing and Troubleshooting
After assembling your AR-15, it’s essential to test fire it at a range to ensure everything is functioning correctly. Here are some troubleshooting tips if you encounter any issues:
- If your rifle fails to cycle properly, check for any obstructions in the barrel or gas system.
- If you experience feeding issues, inspect the magazine for any defects or try using different ammunition brands.
- If your rifle has accuracy problems, consider upgrading your optics or adjusting your sights for better alignment.
5. Maintaining Your AR-15
To keep your AR-15 running smoothly and reliably, regular maintenance is crucial. Here are some maintenance tips to help prolong the lifespan of your rifle:
- Clean your rifle after each use using a cleaning kit with brushes, solvent, and lubricant.
- Inspect all components for wear or damage regularly and replace any parts that show signs of wear.
- Store your rifle in a cool, dry place away from moisture and extreme temperatures to prevent rust or corrosion.
6. Conclusion
Building a reliable AR-15 from scratch can be a fulfilling project that allows you to customize every aspect of your rifle. By selecting high-quality parts, following proper assembly techniques, and maintaining your firearm regularly, you can enjoy years of reliable performance from your custom-built AR-15. Remember always to follow safety guidelines when handling firearms and seek professional help if you encounter any issues during assembly or maintenance.