“Upgrade your AR-15 with a new trigger for improved performance and precision.”
Tools Needed for Installing a New Trigger in Your AR-15
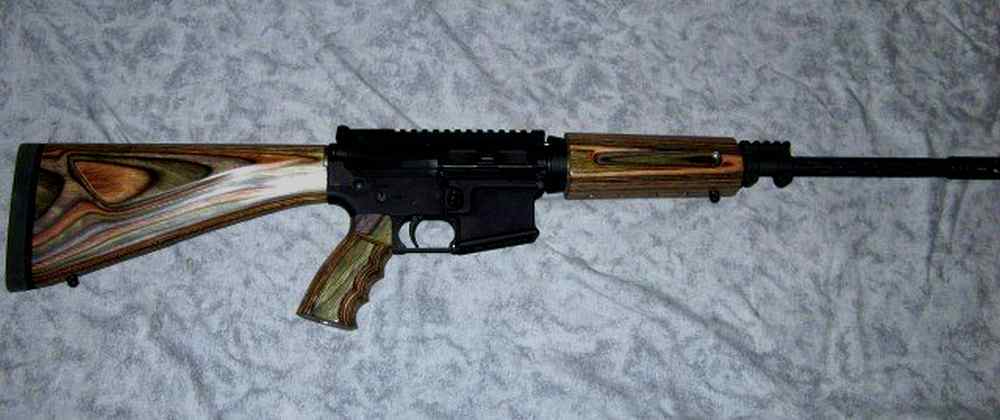
If you’re looking to upgrade your AR-15 rifle, installing a new trigger is a great way to improve its performance. A new trigger can enhance your shooting experience by providing a smoother, crisper pull and better accuracy. While the process of installing a new trigger may seem daunting at first, with the right tools and a little know-how, you can easily complete the job yourself.
Before you begin, it’s important to gather all the necessary tools for the job. Here’s a list of tools you’ll need to install a new trigger in your AR-15:
1. Armorers wrench: An armorers wrench is a versatile tool that can be used for a variety of tasks on your AR-15, including removing the old trigger and installing the new one.
2. Pin punch set: A pin punch set is essential for pushing out the trigger pins that hold the old trigger in place. Make sure to use the correct size punch for the pins on your specific AR-15 model.
3. Hammer: A small hammer will be needed to gently tap the pin punch and remove the trigger pins.
4. Needle-nose pliers: Needle-nose pliers are useful for manipulating small parts and springs during the installation process.
5. Gun oil: Gun oil will help lubricate the trigger components and ensure smooth operation.
6. Cleaning supplies: It’s a good idea to have some cleaning supplies on hand to clean any dirt or debris that may have accumulated in the trigger assembly.

Once you have gathered all the necessary tools, you can begin the process of installing your new trigger. Start by ensuring that your AR-15 is unloaded and the safety is engaged. Next, remove the upper receiver from the lower receiver by pushing out the rear takedown pin and separating the two halves.
Using your armorers wrench, remove the pistol grip from the lower receiver to access the trigger assembly. Carefully push out the trigger pins using the pin punch and hammer. Be sure to keep track of the pins and springs as you remove them, as they will need to be reinstalled with the new trigger.
Once the old trigger is removed, carefully insert the new trigger into the lower receiver, making sure that it is properly aligned with the trigger pin holes. Reinsert the trigger pins and use the pin punch and hammer to secure them in place.
After the new trigger is installed, reattach the pistol grip and ensure that all components are properly tightened. Finally, reassemble the upper and lower receivers and perform a function check to ensure that the new trigger is working correctly.
Installing a new trigger in your AR-15 can be a rewarding experience that will enhance your shooting performance. With the right tools and a little patience, you can easily complete the job yourself. So gather your tools, follow these steps, and enjoy the improved performance of your upgraded AR-15.
Step-by-Step Guide to Installing a New Trigger in Your AR-15
If you’re looking to upgrade your AR-15 rifle, installing a new trigger is a great way to improve its performance. A new trigger can enhance your shooting experience by providing a smoother, lighter pull and better accuracy. While it may seem like a daunting task, installing a new trigger in your AR-15 is actually quite simple with the right tools and a little know-how.
Before you begin, make sure you have all the necessary tools and parts. You’ll need a punch set, a hammer, a flathead screwdriver, and of course, your new trigger kit. It’s also a good idea to have a clean work area with plenty of light so you can see what you’re doing.
The first step is to ensure your rifle is unloaded and the safety is engaged. Once you’ve done that, remove the upper receiver from the lower receiver by pushing out the takedown pin and pivot pin. Set the upper receiver aside and focus on the lower receiver.
Next, remove the pistol grip by loosening the screw at the bottom of the grip. Once the screw is removed, carefully pull the grip off the lower receiver. Be mindful of any springs or detents that may be inside the grip.
With the grip removed, you’ll have access to the trigger assembly. Use your punch set to push out the trigger and hammer pins. These pins can be tight, so you may need to use some force to remove them. Once the pins are out, you can remove the trigger assembly from the lower receiver.
Now it’s time to install your new trigger. Start by inserting the new trigger into the lower receiver, making sure it lines up with the pin holes. Once the trigger is in place, insert the trigger pin and hammer pin back into their respective holes. Use your hammer and punch set to tap the pins back into place.
With the new trigger installed, it’s time to reattach the pistol grip. Slide the grip back onto the lower receiver and tighten the screw at the bottom. Make sure the grip is secure before moving on to the next step.
Finally, reassemble your AR-15 by attaching the upper receiver back to the lower receiver. Push the takedown pin and pivot pin back into place, and you’re ready to test out your new trigger.
In conclusion, installing a new trigger in your AR-15 is a straightforward process that can greatly improve your shooting experience. With the right tools and a little patience, you can upgrade your rifle in no time. Just remember to always follow proper safety procedures and take your time to ensure everything is done correctly. Happy shooting!
Choosing the Right Trigger for Your AR-15
If you’re looking to upgrade your AR-15, installing a new trigger is a great way to improve your shooting experience. A new trigger can enhance your accuracy, reduce trigger pull weight, and provide a smoother, more consistent pull. However, with so many options on the market, it can be overwhelming to choose the right trigger for your AR-15. In this article, we’ll discuss some key factors to consider when selecting a new trigger for your rifle.
First and foremost, it’s important to determine your shooting style and preferences. Are you a competitive shooter looking for a trigger that will give you a competitive edge? Or are you a casual shooter looking for a trigger that will improve your overall shooting experience? Understanding your needs and preferences will help you narrow down your options and choose the right trigger for your AR-15.
Next, consider the type of trigger you want. There are several different types of triggers available, including single-stage, two-stage, and adjustable triggers. Single-stage triggers have a consistent pull weight from start to finish, while two-stage triggers have a lighter initial pull followed by a heavier break. Adjustable triggers allow you to customize the pull weight to suit your preferences. Think about how you like your trigger to feel and function, and choose a trigger type that aligns with your preferences.
Another important factor to consider is the trigger pull weight. Trigger pull weight refers to the amount of force required to pull the trigger and fire the rifle. A lighter trigger pull weight can improve accuracy and make shooting more comfortable, while a heavier trigger pull weight can provide added safety and prevent accidental discharges. Consider your shooting style and preferences when selecting a trigger pull weight that works best for you.
Additionally, think about the material and construction of the trigger. High-quality triggers are typically made from durable materials like steel or aluminum and feature precision machining for a smooth, consistent pull. Look for triggers that are built to last and can withstand the rigors of regular use. A well-made trigger will provide reliable performance and enhance your shooting experience.
Once you’ve chosen the right trigger for your AR-15, it’s time to install it. Installing a new trigger can be a straightforward process, but it’s important to take your time and follow the manufacturer’s instructions carefully. Start by ensuring your rifle is unloaded and safe to work on. Remove the upper and lower receivers from the rifle and disassemble the trigger assembly according to the manufacturer’s instructions.
Next, install the new trigger according to the manufacturer’s guidelines. Make sure all components are properly aligned and secured, and test the trigger to ensure it functions correctly. If you encounter any issues during the installation process, don’t hesitate to seek help from a professional gunsmith or experienced shooter.
In conclusion, choosing the right trigger for your AR-15 is an important decision that can greatly impact your shooting experience. Consider your shooting style, preferences, and needs when selecting a trigger, and choose a trigger that aligns with your preferences. Once you’ve chosen the right trigger, take your time to install it properly and ensure it functions correctly. With the right trigger installed, you’ll enjoy improved accuracy, comfort, and performance when shooting your AR-15.
Common Mistakes to Avoid When Installing a New Trigger in Your AR-15
Installing a new trigger in your AR-15 can be a great way to improve the performance and feel of your rifle. However, there are some common mistakes that many people make when installing a new trigger that can lead to issues down the road. In this article, we will discuss some of these common mistakes and how you can avoid them to ensure a smooth and successful installation.
One of the most common mistakes that people make when installing a new trigger in their AR-15 is not properly cleaning and lubricating the trigger components before installation. It is important to thoroughly clean all of the trigger components to remove any dirt, debris, or old lubricant that may be present. This will help to ensure that the trigger functions properly and smoothly once installed.
Another common mistake that people make is not properly aligning the trigger components during installation. It is important to carefully follow the manufacturer’s instructions and ensure that all of the components are aligned correctly before tightening any screws or pins. Failure to do so can result in a trigger that does not function properly or is difficult to operate.
One of the most important things to remember when installing a new trigger in your AR-15 is to take your time and be patient. Rushing through the installation process can lead to mistakes and issues that could have been easily avoided. Make sure to carefully read and follow the manufacturer’s instructions, and double-check your work at each step to ensure that everything is done correctly.
Another common mistake that people make when installing a new trigger in their AR-15 is not properly testing the trigger after installation. It is important to test the trigger to ensure that it functions properly and safely before using the rifle. This can help to identify any issues or problems early on and prevent any accidents or malfunctions down the road.
One final common mistake that people make when installing a new trigger in their AR-15 is not seeking help or guidance from a professional if they are unsure of what they are doing. If you are not confident in your ability to install a new trigger, it is always best to seek help from someone who has experience with AR-15s or firearms in general. This can help to prevent any mistakes or issues that could arise from improper installation.
In conclusion, installing a new trigger in your AR-15 can be a great way to improve the performance and feel of your rifle. However, there are some common mistakes that many people make when installing a new trigger that can lead to issues down the road. By properly cleaning and lubricating the trigger components, aligning the components correctly, taking your time, testing the trigger after installation, and seeking help if needed, you can avoid these common mistakes and ensure a smooth and successful installation.
Tips for Testing and Adjusting Your New Trigger in Your AR-15
So, you’ve decided to upgrade the trigger in your AR-15. Congratulations! A new trigger can greatly improve the performance and accuracy of your rifle. However, installing a new trigger can be a bit tricky if you’re not familiar with the process. In this article, we’ll walk you through the steps of installing a new trigger in your AR-15, as well as provide some tips for testing and adjusting your new trigger.
First things first, make sure you have all the necessary tools and parts before you begin. You’ll need a punch set, a hammer, a vise block, and of course, your new trigger. It’s also a good idea to have a clean work area with plenty of light so you can see what you’re doing.
To start, make sure your rifle is unloaded and the safety is engaged. Remove the upper receiver from the lower receiver and set the upper receiver aside. Next, remove the pistol grip from the lower receiver by removing the screw that holds it in place. Once the grip is removed, you’ll have access to the trigger assembly.
Using your punch set and hammer, push out the trigger and hammer pins. Be careful not to lose these pins, as you’ll need them to install your new trigger. Once the pins are removed, you can take out the old trigger assembly and replace it with your new trigger.
Insert the new trigger assembly into the lower receiver, making sure the trigger and hammer pins line up with the holes in the receiver. Use your punch set and hammer to tap the pins back into place. Make sure the pins are fully seated and secure before moving on to the next step.
Once the new trigger is installed, it’s time to test it out. Reassemble your rifle and take it to the range for some test firing. Start by firing a few rounds to get a feel for the new trigger. Pay attention to the pull weight, reset, and overall feel of the trigger.
If you’re not happy with how the trigger feels, don’t worry. Most aftermarket triggers come with adjustable features that allow you to customize the trigger to your liking. Consult the manufacturer’s instructions for your specific trigger to learn how to adjust the pull weight, overtravel, and reset.
When making adjustments to your trigger, it’s important to do so in small increments. Make a small adjustment, then test fire the rifle to see how it feels. Keep making adjustments until you find the perfect setting for your trigger.
Remember, safety is always the top priority when working on firearms. Always follow proper safety procedures and guidelines when installing a new trigger in your AR-15. If you’re not comfortable with the process, don’t hesitate to seek help from a professional gunsmith.
In conclusion, installing a new trigger in your AR-15 can greatly improve the performance and accuracy of your rifle. By following these steps and tips for testing and adjusting your new trigger, you’ll be well on your way to enjoying a smoother and more responsive trigger pull. Happy shooting!