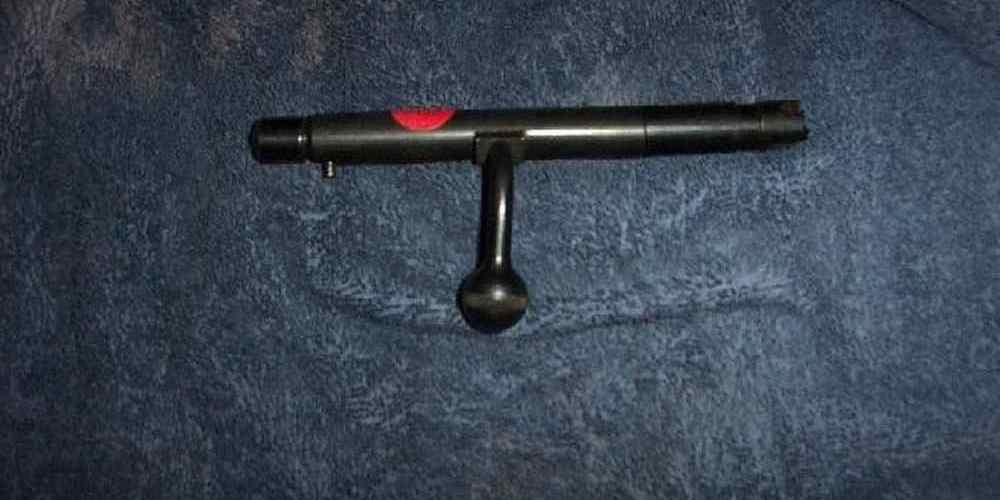
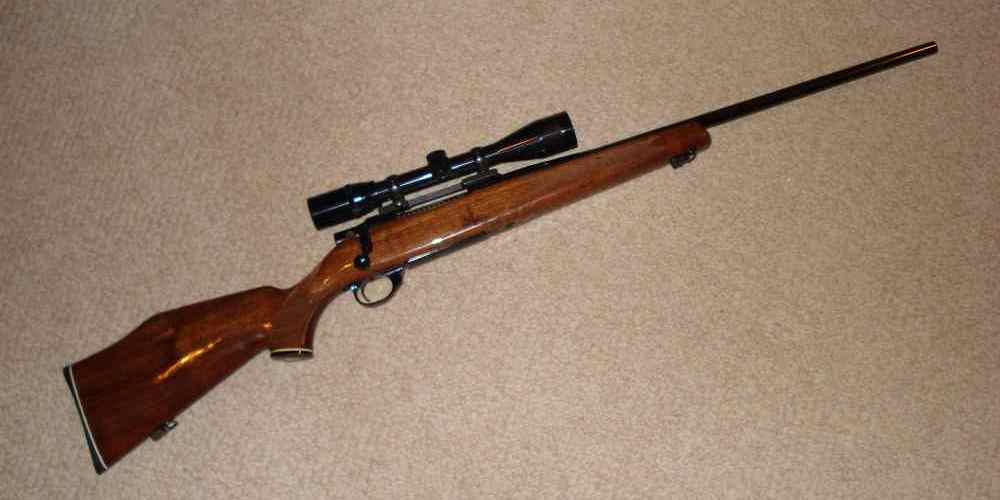
“Master the art of rifle maintenance with our comprehensive bolt assembly and disassembly guide.”
Proper Tools Needed for Rifle Bolt Assembly and Disassembly
When it comes to rifle bolt assembly and disassembly, having the proper tools is essential to ensure a smooth and efficient process. Whether you are a seasoned gunsmith or a beginner looking to learn more about your firearm, having the right tools on hand will make the job much easier. In this guide, we will discuss the tools you will need for rifle bolt assembly and disassembly, as well as some tips for using them effectively.
One of the most important tools you will need for rifle bolt assembly and disassembly is a set of screwdrivers. It is crucial to have screwdrivers that are the correct size and shape for the screws on your rifle. Using the wrong size screwdriver can strip the screws, making them difficult or impossible to remove. Invest in a good quality set of gunsmithing screwdrivers to ensure that you have the right tools for the job.
In addition to screwdrivers, you will also need a set of punches for rifle bolt assembly and disassembly. Punches are used to drive out pins and other components that may be holding the bolt together. It is important to use the correct size punch for the job to avoid damaging the rifle or the components you are working on. A set of brass punches is ideal for gunsmithing, as they are softer than steel punches and less likely to cause damage.
Another essential tool for rifle bolt assembly and disassembly is a bench block. A bench block is a sturdy surface with holes and cutouts that are designed to hold your rifle components in place while you work on them. Using a bench block will help prevent damage to your rifle and make it easier to disassemble and reassemble the bolt. Look for a bench block that is specifically designed for gunsmithing to ensure that it is the right size and shape for your rifle.
A vise is another tool that can be helpful for rifle bolt assembly and disassembly. A vise can hold your rifle securely in place while you work on it, making it easier to remove and install components. Make sure to use padded jaws on your vise to prevent damage to your rifle’s finish. A vise can also be useful for holding small components in place while you work on them, making it easier to manipulate them with your hands or tools.
Finally, a set of cleaning brushes and solvents is essential for maintaining your rifle bolt. Keeping your bolt clean and well-lubricated is crucial for ensuring smooth operation and preventing malfunctions. Use a nylon brush to scrub away dirt and debris, and a solvent to remove any built-up residue. Make sure to lubricate your bolt with a high-quality gun oil or grease to keep it functioning properly.
In conclusion, having the proper tools for rifle bolt assembly and disassembly is essential for maintaining your firearm and ensuring its proper function. Invest in a set of quality screwdrivers, punches, bench block, vise, and cleaning supplies to make the job easier and more efficient. By using the right tools and following proper procedures, you can keep your rifle in top condition for years to come.
Step-by-Step Guide to Disassembling a Rifle Bolt
If you own a rifle, it’s important to know how to properly disassemble and reassemble the bolt. This crucial component of your firearm requires regular maintenance to ensure it functions properly and safely. In this step-by-step guide, we will walk you through the process of disassembling a rifle bolt.

First, make sure your rifle is unloaded and the safety is engaged. Always follow proper safety procedures when handling firearms. Once you have confirmed the rifle is safe, you can begin the disassembly process.
Start by removing the bolt from the rifle. Depending on the make and model of your rifle, this may involve pressing a button or lever to release the bolt. Once the bolt is removed, place it on a clean, flat surface.
Next, locate the firing pin assembly. This is typically located at the rear of the bolt. Using a small punch or screwdriver, carefully remove the retaining pin that holds the firing pin in place. Once the retaining pin is removed, you can slide the firing pin assembly out of the bolt.
With the firing pin assembly removed, you can now access the extractor. The extractor is responsible for removing spent casings from the chamber of the rifle. Using a small tool, carefully remove the extractor from the bolt. Be sure to keep track of any small springs or pins that may be part of the extractor assembly.
Once the extractor is removed, you can now disassemble the bolt further. Depending on the make and model of your rifle, this may involve removing additional pins or screws. Take your time and pay close attention to how each component is removed, as you will need to reassemble the bolt later.
With the bolt fully disassembled, you can now clean each component thoroughly. Use a solvent and a brush to remove any built-up residue or debris. Pay special attention to the firing pin channel and extractor groove, as these areas can become clogged with carbon and dirt.
After cleaning each component, inspect them for any signs of wear or damage. If you notice any issues, such as a worn firing pin or a damaged extractor, it may be time to replace these parts. It’s important to keep your rifle in good working condition to ensure it functions safely and reliably.
Once you have cleaned and inspected each component, you can begin the reassembly process. Start by reassembling the bolt in the reverse order that you disassembled it. Be sure to carefully align each component and use caution when reinserting retaining pins or screws.
Once the bolt is fully reassembled, test it to ensure it functions properly. You can do this by dry-firing the rifle or by manually cycling the bolt. If everything is working correctly, you can reinsert the bolt into the rifle and continue with your shooting activities.
By following this step-by-step guide, you can confidently disassemble and reassemble the bolt of your rifle. Regular maintenance of this crucial component will help ensure your firearm functions safely and reliably for years to come. Remember to always follow proper safety procedures when handling firearms and seek professional help if you are unsure about any aspect of rifle maintenance.
Common Mistakes to Avoid When Assembling a Rifle Bolt
Assembling a rifle bolt may seem like a daunting task, but with the right knowledge and tools, it can be a straightforward process. However, there are some common mistakes that many people make when assembling a rifle bolt that can lead to malfunctions or even damage to the firearm. In this guide, we will discuss some of these common mistakes and how to avoid them.
One of the most common mistakes when assembling a rifle bolt is not properly cleaning and lubricating the parts before putting them back together. It is essential to ensure that all parts are free of dirt, debris, and old lubricant before reassembly. Failure to do so can lead to increased friction between moving parts, which can cause the rifle to malfunction or even jam.
Another common mistake is not following the manufacturer’s instructions for reassembly. Each rifle bolt is designed differently, and it is crucial to follow the specific instructions provided by the manufacturer to ensure proper assembly. Failure to do so can result in misalignment of parts, which can affect the rifle’s performance and accuracy.
Additionally, some people make the mistake of over-tightening screws and bolts during assembly. While it is essential to ensure that all parts are securely fastened, over-tightening can put unnecessary stress on the components, leading to premature wear and potential damage. It is crucial to use the correct torque specifications provided by the manufacturer to avoid this mistake.
Another common mistake is not properly aligning the parts during assembly. It is essential to ensure that all parts are correctly aligned before tightening any screws or bolts. Failure to do so can result in misalignment, which can affect the rifle’s functionality and accuracy. Taking the time to double-check the alignment of parts can save you from potential issues down the line.
One of the most critical steps in assembling a rifle bolt is headspacing. Headspacing is the process of ensuring that the distance between the bolt face and the chamber is correct. Failure to properly headspace the rifle bolt can result in dangerous malfunctions, such as misfires or even catastrophic failures. It is crucial to follow the manufacturer’s instructions for headspacing to ensure the rifle is safe to use.
Lastly, one common mistake that people make when assembling a rifle bolt is rushing through the process. It is essential to take your time and carefully follow each step to ensure that the rifle is assembled correctly. Rushing through the process can lead to missed steps or improperly assembled parts, which can affect the rifle’s performance and safety.
In conclusion, assembling a rifle bolt can be a straightforward process if done correctly. By avoiding these common mistakes, you can ensure that your rifle functions properly and safely. Remember to clean and lubricate all parts, follow the manufacturer’s instructions, use the correct torque specifications, align parts correctly, headspace the rifle bolt properly, and take your time during assembly. By following these guidelines, you can avoid common mistakes and enjoy a well-assembled rifle bolt.
Tips for Cleaning and Maintaining a Rifle Bolt
Rifle bolt assembly and disassembly can be a daunting task for many gun owners, but with the right knowledge and tools, it can be a straightforward process. Proper maintenance of your rifle bolt is essential to ensure its longevity and optimal performance. In this guide, we will provide you with some tips for cleaning and maintaining your rifle bolt to keep it in top condition.
Before you begin disassembling your rifle bolt, it is important to ensure that the firearm is unloaded and the safety is engaged. Always follow the manufacturer’s instructions for disassembly and reassembly to avoid damaging your rifle bolt. Start by removing the bolt from the rifle according to the manufacturer’s guidelines.
Once you have removed the bolt, inspect it for any signs of wear or damage. Check the firing pin, extractor, and other components for any dirt, debris, or corrosion. Use a soft brush and gun cleaning solvent to clean the bolt thoroughly, paying special attention to the locking lugs and other critical areas.
After cleaning the bolt, inspect the firing pin for any signs of wear or damage. If necessary, replace the firing pin with a new one to ensure reliable ignition. Lubricate the firing pin and other moving parts of the bolt with a high-quality gun oil to prevent rust and ensure smooth operation.
Next, reassemble the bolt according to the manufacturer’s instructions. Make sure all components are properly aligned and secured before reinserting the bolt into the rifle. Test the bolt to ensure it functions correctly before using the firearm.
Regularly clean and lubricate your rifle bolt to prevent malfunctions and ensure reliable performance. After each use, wipe down the bolt with a clean cloth to remove any dirt, debris, or moisture. Apply a thin layer of gun oil to the bolt to protect it from rust and corrosion.
Store your rifle in a cool, dry place to prevent rust and corrosion. Avoid exposing the rifle to extreme temperatures or humidity, as this can damage the bolt and other components. Regularly inspect your rifle for any signs of wear or damage and address any issues promptly to prevent further damage.
In conclusion, proper maintenance of your rifle bolt is essential to ensure its longevity and optimal performance. By following the tips outlined in this guide, you can keep your rifle bolt in top condition and enjoy years of reliable use. Remember to always follow the manufacturer’s instructions for cleaning and maintaining your rifle bolt to avoid damaging the firearm. With regular care and maintenance, your rifle bolt will continue to perform flawlessly for years to come.
Safety Precautions to Take When Handling Rifle Bolts
When it comes to handling rifle bolts, safety should always be the top priority. Whether you are assembling or disassembling a rifle bolt, there are certain precautions that you should take to ensure that you and those around you are safe at all times.
One of the most important safety precautions to take when handling rifle bolts is to always treat the firearm as if it is loaded. Even if you are certain that the rifle is unloaded, it is crucial to follow this rule to prevent any accidents from occurring. Always keep the muzzle pointed in a safe direction and never point it at anything that you do not intend to shoot.
Another important safety precaution to take is to make sure that the rifle is completely unloaded before beginning any work on the bolt assembly or disassembly. This means removing the magazine and checking the chamber to ensure that there are no rounds present. It is also a good idea to wear safety glasses to protect your eyes from any debris that may be released during the process.
When disassembling a rifle bolt, it is important to work in a clean and well-lit area. This will help you to see any small parts that may be difficult to spot and prevent them from getting lost. It is also a good idea to have a clean work surface to prevent any dirt or debris from getting into the rifle mechanism.
As you begin to disassemble the rifle bolt, it is important to follow the manufacturer’s instructions carefully. Each rifle may have slightly different disassembly procedures, so it is crucial to refer to the owner’s manual for specific guidance. Take your time and be patient, as rushing through the process can lead to mistakes and potentially dangerous situations.
When handling the individual components of the rifle bolt, be sure to handle them with care. Some parts may be small and delicate, so it is important to be gentle to avoid damaging them. If you are unsure of how a certain part should be handled, refer back to the owner’s manual for guidance.
Once you have completed the disassembly process, it is important to thoroughly clean and inspect each component before reassembling the rifle bolt. Use a cleaning solvent and a brush to remove any dirt or debris that may have accumulated on the parts. Inspect each component for any signs of wear or damage, and replace any parts that appear to be worn out.
When reassembling the rifle bolt, be sure to follow the manufacturer’s instructions in reverse order. Take your time and double-check each step to ensure that the bolt is assembled correctly. Once the bolt is fully assembled, perform a function check to ensure that it is working properly before loading any ammunition.
By following these safety precautions when handling rifle bolts, you can help to prevent accidents and ensure that you and those around you remain safe. Remember to always treat the firearm as if it is loaded, work in a clean and well-lit area, and handle the components with care. With proper precautions and attention to detail, you can safely assemble and disassemble your rifle bolt with confidence.


