“Design, Build, and Shoot with Precision – The Ultimate AR15 Build Blueprint”
Choosing the Right AR15 Build Blueprint for Your Project
When it comes to building your own AR15, having a solid blueprint is essential to ensure that your project goes smoothly and that the end result is exactly what you envisioned. One of the best tools you can use to create a detailed and accurate blueprint for your AR15 build is Computer-Aided Design (CAD) software. CAD software allows you to create precise 3D models of your AR15 build, which can help you visualize the final product and identify any potential issues before you start assembling your rifle.
Before you start using CAD software to create your AR15 build blueprint, it’s important to have a clear idea of what you want your rifle to look like and how you want it to perform. Consider factors such as barrel length, caliber, stock type, and any additional features you want to include, such as optics or a bipod. Having a clear vision of your project will make it easier to create an accurate blueprint that meets your needs and expectations.
Once you have a clear idea of what you want your AR15 build to look like, it’s time to start using CAD software to create your blueprint. There are many different CAD programs available, ranging from simple and user-friendly options to more complex and advanced software. Choose a program that fits your skill level and budget, and that offers the features you need to create a detailed and accurate blueprint of your AR15 build.
When creating your AR15 build blueprint in CAD software, start by sketching out the basic shape and dimensions of your rifle. Use the software’s tools to create accurate measurements and angles, and to add details such as rail systems, handguards, and other components. As you work on your blueprint, take the time to review your design from all angles to ensure that everything is in the right place and that there are no potential issues or conflicts between components.
One of the benefits of using CAD software to create your AR15 build blueprint is that it allows you to easily make changes and adjustments to your design. If you decide that you want to change the length of the barrel, add a different stock, or include a new accessory, you can quickly update your blueprint to reflect these changes. This flexibility can save you time and money by allowing you to make adjustments before you start assembling your rifle.
Once you have created a detailed and accurate blueprint of your AR15 build in CAD software, you can use this design to guide you through the assembly process. Refer to your blueprint as you gather the necessary components and tools, and use it as a reference as you put your rifle together. Having a detailed blueprint will help you stay organized and ensure that your AR15 build is completed correctly and efficiently.
In conclusion, creating a detailed and accurate blueprint for your AR15 build is essential to the success of your project. Using CAD software to create your blueprint can help you visualize your design, identify potential issues, and make adjustments as needed. By taking the time to create a solid blueprint before you start assembling your rifle, you can ensure that your AR15 build meets your needs and expectations.
Understanding CAD Software for AR15 Builds
When it comes to building your own AR15, having a solid plan in place is essential. One tool that can help you visualize and design your project is Computer-Aided Design (CAD) software. CAD software allows you to create detailed 3D models of your AR15 build, helping you to plan out every aspect of the project before you even pick up a wrench.
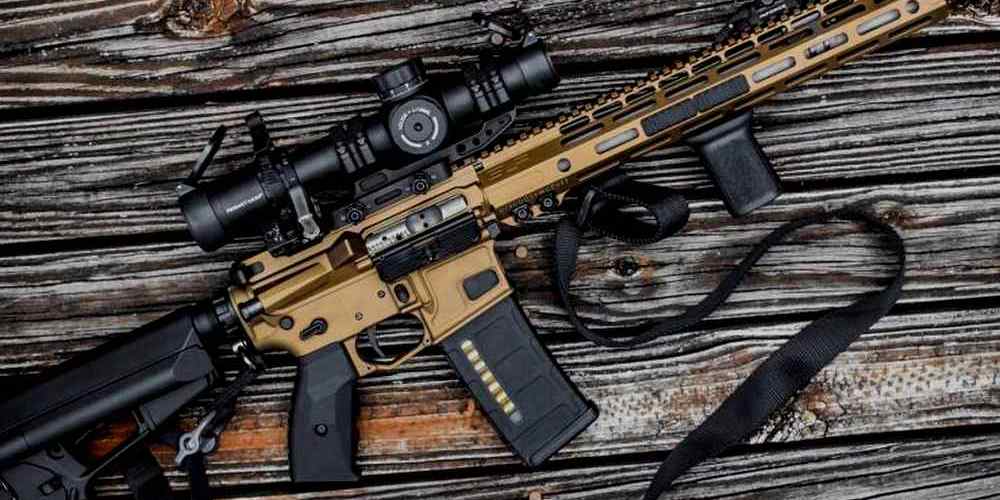
One of the key benefits of using CAD software for your AR15 build is the ability to see how all the components fit together. By creating a 3D model of your build, you can ensure that all the parts will work together seamlessly and avoid any potential issues before you start assembling your rifle.
CAD software also allows you to experiment with different configurations and designs for your AR15. You can easily swap out different parts and accessories to see how they look and function in your build. This can help you make informed decisions about which components to use and how to optimize your rifle for your specific needs.
In addition to helping you plan out your build, CAD software can also be a valuable tool for troubleshooting. If you encounter any issues during the assembly process, you can refer back to your 3D model to identify the problem and come up with a solution. This can save you time and frustration, ensuring that your AR15 build goes smoothly from start to finish.
There are many different CAD software options available, ranging from simple and user-friendly programs to more advanced and complex tools. Some popular CAD software options for AR15 builds include SolidWorks, AutoCAD, and Fusion 360. Each of these programs has its own strengths and weaknesses, so it’s important to choose the one that best suits your needs and experience level.
When using CAD software for your AR15 build, it’s important to take the time to learn how to use the program effectively. Many CAD software programs offer tutorials and online resources to help you get started, so be sure to take advantage of these resources to familiarize yourself with the software and its features.
As you begin planning your AR15 build with CAD software, start by creating a basic 3D model of your rifle. Include all the major components, such as the upper and lower receivers, barrel, handguard, and stock. Once you have a basic model in place, you can start experimenting with different configurations and designs to see what works best for your build.
As you work on your AR15 build in CAD software, don’t be afraid to get creative and try out new ideas. CAD software allows you to easily make changes and adjustments to your design, so feel free to experiment and see what works best for your build. Remember, the goal of using CAD software is to help you plan out your AR15 build and ensure that everything comes together smoothly in the end.
In conclusion, CAD software can be a valuable tool for planning and designing your AR15 build. By creating a detailed 3D model of your rifle, you can visualize how all the components fit together, experiment with different configurations, and troubleshoot any issues that may arise during the assembly process. With the right CAD software and a bit of creativity, you can plan out your AR15 build with confidence and precision.
Step-by-Step Guide to Planning Your AR15 Build Project
So you’ve decided to take on the exciting project of building your own AR15 rifle. Congratulations! Building your own firearm can be a rewarding and fulfilling experience, but it’s important to approach the project with careful planning and attention to detail. One tool that can help you in this process is Computer-Aided Design (CAD) software. In this article, we’ll walk you through the steps of planning your AR15 build project using CAD.
The first step in planning your AR15 build project is to gather all the necessary information and resources. This includes the specifications of the AR15 rifle you want to build, as well as any parts or components you already have or plan to purchase. It’s important to have a clear understanding of the dimensions, materials, and features of the rifle you want to build before you start designing it in CAD.
Once you have all the necessary information, the next step is to choose a CAD software program to use for your project. There are many different CAD programs available, ranging from simple and user-friendly to complex and professional-grade. It’s important to choose a program that you feel comfortable using and that has the features you need for your project.
After selecting a CAD program, the next step is to start designing your AR15 rifle. Begin by creating a 3D model of the rifle, including all the individual parts and components. Pay close attention to the dimensions and proportions of each part, as well as how they fit together to form the complete rifle. CAD software allows you to easily manipulate and adjust the design as needed, making it a valuable tool for planning your AR15 build project.
As you work on your design, be sure to consider factors such as ergonomics, functionality, and aesthetics. Think about how the rifle will feel in your hands, how it will perform in different shooting scenarios, and how it will look once it’s completed. CAD software allows you to visualize your design in 3D, giving you a better understanding of how the finished rifle will look and function.
Once you have completed your design in CAD, the next step is to review and refine it as needed. Take the time to carefully inspect the design, looking for any errors or inconsistencies that need to be corrected. Make any necessary adjustments to ensure that the design meets your specifications and requirements.
After finalizing your design, the last step is to create a detailed blueprint of your AR15 build project. This blueprint should include all the necessary information for building the rifle, such as dimensions, materials, and assembly instructions. Having a detailed blueprint will help you stay organized and on track as you work on your project.
In conclusion, planning your AR15 build project with CAD can help you create a detailed and accurate design for your rifle. By following the steps outlined in this article, you can ensure that your AR15 build project is a success. So grab your CAD software and get started on designing your dream AR15 rifle today!
Tips and Tricks for a Successful AR15 Build Using CAD
Are you considering building your own AR15 rifle using Computer-Aided Design (CAD)? If so, you’re in the right place! Building your own AR15 can be a rewarding and fulfilling project, but it requires careful planning and attention to detail. Using CAD software can help you visualize and design your build before you even pick up a wrench. In this article, we’ll provide you with some tips and tricks for a successful AR15 build using CAD.
First and foremost, it’s essential to have a clear understanding of what you want your AR15 to look like and how you want it to perform. Are you building a rifle for long-range precision shooting, or are you looking for a lightweight and compact carbine for close-quarters combat? Knowing your intended use will help you make informed decisions when designing your build in CAD.
Once you have a clear vision for your AR15 build, it’s time to start designing. CAD software allows you to create detailed 3D models of your rifle, including individual components such as the upper and lower receivers, barrel, handguard, and stock. Take your time to carefully design each part, ensuring that they fit together seamlessly and function properly.
One of the benefits of using CAD for your AR15 build is the ability to test different configurations and make adjustments before you start building. For example, you can experiment with different barrel lengths, handguard styles, and stock options to see how they affect the overall look and feel of your rifle. This iterative design process can help you refine your build and ensure that it meets your expectations.
When designing your AR15 build in CAD, it’s important to pay attention to the small details. Make sure that all components are properly aligned and that there are no interference issues that could affect the functionality of your rifle. Additionally, consider factors such as weight distribution, ergonomics, and aesthetics to create a well-balanced and visually appealing build.
As you design your AR15 build in CAD, don’t forget to consider the materials and manufacturing processes that will be used to bring your design to life. Think about the type of metal or polymer that will be used for each component, as well as any special coatings or finishes that you may want to apply. Understanding these factors will help you create a build that is not only functional but also durable and reliable.
Once you have finalized your AR15 design in CAD, it’s time to bring your build to life. Whether you choose to manufacture the components yourself or work with a professional gunsmith, having a detailed CAD model will make the building process much smoother and more efficient. Use your CAD model as a reference guide to ensure that each component is machined or assembled correctly.
In conclusion, building your own AR15 using CAD can be a fun and rewarding project, but it requires careful planning and attention to detail. By following the tips and tricks outlined in this article, you can create a successful AR15 build that meets your expectations and performs flawlessly. So grab your CAD software and start designing – your dream AR15 build is just a few clicks away!
Common Mistakes to Avoid When Using CAD for Your AR15 Build Project
When it comes to building your own AR15, using Computer-Aided Design (CAD) software can be a game-changer. CAD allows you to create detailed plans and schematics for your build, helping you visualize the final product before you even start assembling it. However, there are some common mistakes that people make when using CAD for their AR15 build projects. In this article, we will discuss these mistakes and how you can avoid them to ensure a successful build.
One of the most common mistakes that people make when using CAD for their AR15 build project is not taking accurate measurements. It is crucial to measure every component of your build accurately to ensure that everything fits together properly. Even the smallest miscalculation can lead to major issues down the line, so it is important to double-check your measurements before finalizing your plans.
Another common mistake is not considering the tolerances of the components you are using in your build. Different manufacturers may have slightly different specifications for their parts, so it is important to account for these variations in your CAD design. Failing to do so can result in parts that do not fit together properly, leading to a build that is not functional.
One of the biggest advantages of using CAD for your AR15 build project is the ability to test different configurations and designs before committing to a final plan. However, some people make the mistake of not testing their designs thoroughly enough. It is important to simulate different scenarios and stress tests to ensure that your build will hold up under real-world conditions. This can help you identify any potential weaknesses in your design and make necessary adjustments before starting the build.
Another common mistake is not seeking feedback from others during the design process. It can be easy to get tunnel vision when working on a CAD project, so it is important to get input from others to ensure that you are not overlooking any potential issues. Whether it is a fellow builder, a gunsmith, or an online forum, getting feedback from others can help you catch mistakes that you may have missed on your own.
Finally, one of the most common mistakes that people make when using CAD for their AR15 build project is rushing through the design process. Building an AR15 is a complex project that requires careful planning and attention to detail. Rushing through the design phase can lead to costly mistakes and delays down the line. Take your time to thoroughly plan out your build, test different configurations, and seek feedback from others to ensure a successful project.
In conclusion, using CAD for your AR15 build project can be a powerful tool to help you visualize and plan out your build. However, there are common mistakes that people make when using CAD that can lead to issues during the build process. By taking accurate measurements, considering component tolerances, testing your designs thoroughly, seeking feedback from others, and avoiding rushing through the design process, you can avoid these common pitfalls and ensure a successful AR15 build project.


